 | |||
|
| Home > Astronomy > ACAM > ACAM spectroscopy - acquisition tool |
ACAM spectroscopy - acquisition tool
ACAM has no equivalent of the slit-viewing camera used with ISIS.
Targets are acquired onto the slit in imaging mode (LIRIS
observers do the same),
using the
ACAM acquisition tool
(commissioned in October 2010, by Samantha Rix).
The telescope operator can take care of this, but the
tool is easy to use, and observers with many targets may
want to do most of the acquisition themselves.
If for any reason the acquisition tool is unavailable, the target can be acquired manually (but this is fiddly, and takes longer). The acquisition procedure is as follows:
A short description of each step is given below. For detailed information about use of the acquisition tool, refer to the ACAM acquisition-tool user's guide. A 1-page word-format summary of the procedure, written by Fiona Riddick (observing support assistant), is also available.
1 - Start the ACAM acquisition tool
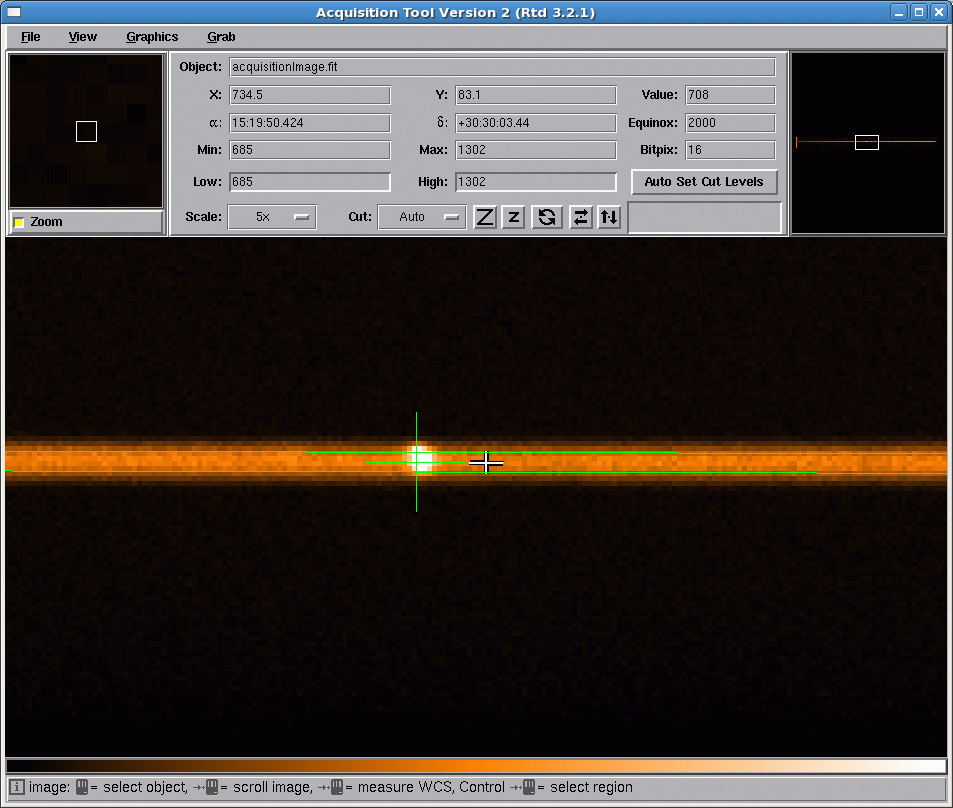
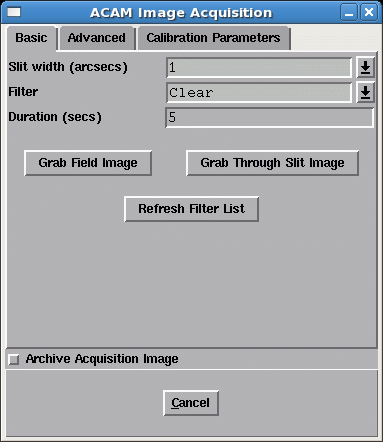
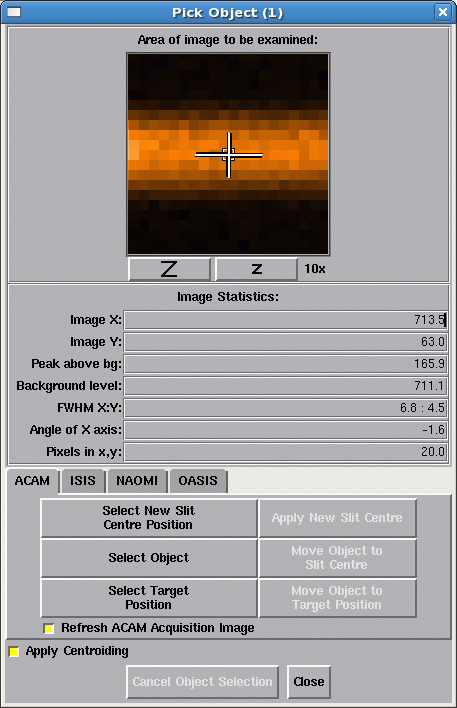
Start the acquisition tool by by typing: acqtool & in the pink WHTICS window. When the display comes up, click on the 'grab' button at the top and select 'Grab ACAM...' to bring up the image-acquisition window. Then click on the 'View' button on the main display, and select 'Pick object' to bring up a third window. The three windows, all of which are needed for target acquisition, look something like this:
On the same window, select from the filter menu a filter of similar wavelength to the range of interest, particularly when observing at other than the parallactic angle, or at large airmass. Occasionally, the acquisition tool fails (and the windows disappear). If this happens, restart the tool with the acqtool command as above, but then check that the CCD configuration (windows, speed, binning) is OK - it may have been left in an unexpected state.
2 - Point the telescope
TO> gocat target-name & Ask the telescope operator to set the rotator angle to the required position angle (usually parallactic). The operator will then also look for guide stars.
3 - Identify the x,y position of the centre of the slit
The y position of the slit depends on the slit to be used, and can also change by several pixels when the telescope is pointed to a new target (flexure due to change of elevation and of Cassegrain rotator angle). Checking the position of the slit takes only a few seconds and is recommended whenever changing the slit to be used, or when there's a large change of elevation or rotator angle. Typically, the centre of the 1.0-arcsec slit lies at y ~ 1150 when using the standard window (1:2148,800:3300). The y position of the slit varies slightly along the length of the slit (curvature). The small differences (< 1 arcsec) between the y positions of ACAM's individual slits, when nominally on-axis, are reported on the ACAM slit-positions page. To check the position of the slit, select 'Grab through-slit image' on the 'ACAM acquisition window'. This configures ACAM in imaging mode, with the specified filter and exposure time, but with the required slit also in the light path, in order to take an image of the back of the slit. An exposure of a few sec should be enough to see the slit, even on a moonless night. If the green overlay does not coincide (in the y direction) with the displayed slit, within ~ 1 pixel, click on 'Select new slit-centre position' on the 'Pick object' menu, click on the new position and then on 'Apply new slit centre'. To save time, the slit position can safely be measured while waiting for completion of the azimuth slew, if the telescope has finished slewing in elevation and in rotator angle. The same filter should be used throughout steps 3 - 7 of the acquisition sequence (changing filter may change the position of the image on the CCD by a few arcsec).
4 - Take an image of the field, centre the target on the slit
On the 'ACAM image acquisition' window:
NB the acquisition tool changes the CCD binning set by the observer, and restores it after acquisition. On the 'Pick object' window, click on 'Select object', click on the target in the displayed image, then click on 'Move object to slit centre' to offset the telescope appropriately. If the target isn't well-centred in the window, repeat this procedure. More than two iterations should not be needed.
5 - Check the through-slit image, finish acquisition
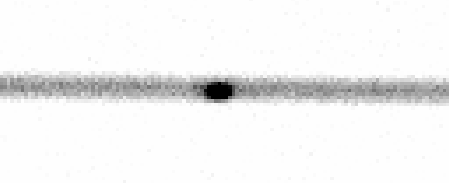
Click on 'Grab through-slit image' on the 'ACAM acquisition window', you should see something like this:
If the object acquired at this point is the science target, ask the telescope operator to start autoguiding, and ask him/her to make any final adjustment needed to centre the target in the slit. If on the other hand the object acquired is the blind-offset star rather than the science target itself, ask the operator to blind-offset to the target, and then start autoguiding as quickly as possible. The blind-offset accuracy is < 0.2 arcsec over an offset of at least 20 arcmin.
6 - Insert the VPH, start exposing
TO> acamspec v400 1 (for a 1-arcsec slit) E.g. for an 1800-sec exposure:
7 - Record an acquisition image
TO> run acam 60 If no blind-offsetting is involved, this could be done after step 4 above, but otherwise it's probably best to leave it until after the science exposure, to avoid moving components in and out. Take an arc first though, if wavelength calibration is important.
Position of spectrum on the CCD
 x    400    520   630   1100   1600   1700

dx   -9.1  -13.1  -6.9   -1.9    7.5    8.4
|
| Top | Back |
|


