AF2 & WYFFOS
AF2+WYFFOS
is the multi-object, wide-field, fibre spectrograph at prime focus. It
contains 150 science fibres each of 1.6" diameter, and 10 fiducial
bundles for acquisition and guiding. At prime focus, the fibres are
placed onto a field plate by the robot positioner AF2 at user-defined
sky coordinates. Object light is transmitted along fibres 26m in length
to the Wide Field Fibre Optical Spectrograph (WYFFOS). The path from
Prime focus to the spectrograph consists of a prism, fibre button, 26
metres of fibre, finger, microlens and the facet block.
Startup:
TCS
Autoguider TV
First night tasks:
Rotator Centre
7-Star Calibrate
Gripper Centre
Aperture 0
Acquisition:
Configured
Field Standards
FibreGuider - for
acquisition and guiding
Bad pointing
Arcs
Sky Exposures
AF2 Command Summary
Rotator
Limits
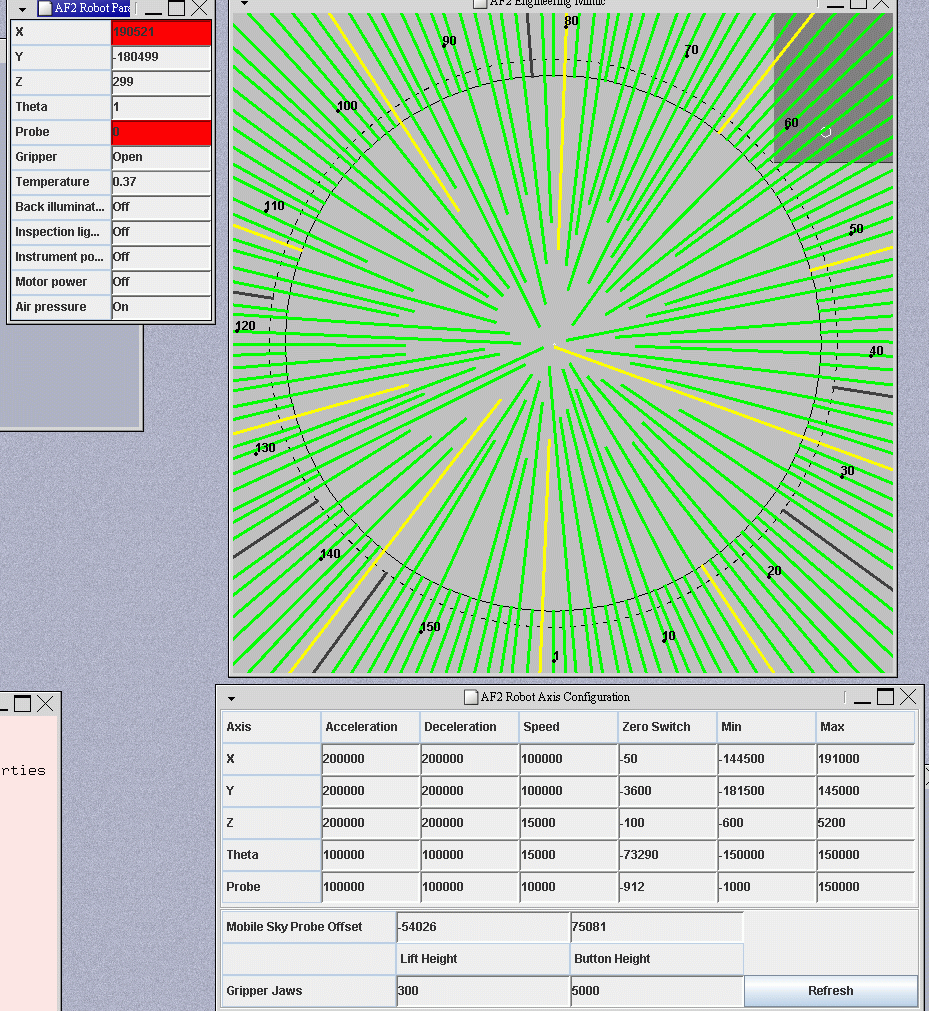
AF2 GUI
AF2 MIMIC - needs adding
WYFFOS MIMIC - needs adding
Old Parameters
See also:
AF2
Main Page including recovery
procedures
AF2
Commands complete list
FibreGuider
Full Guide - get new link!
Important!
- Remember to SLEEP the robot before taking science
exposures:
SYS> af2 sleep
- When the dome temperature is cold (< 5 C), you
need to
exercise
the gripper regularly: af2 wake, af2 sleep, af2 wake, af2 sleep, then
it can be used as normal.
Startup
TCS:
- USER> STATION PRIME
- USER> INSTRUMENT AUTOFIB
- USER> AGSELECT AF2_TV
- USER> FOCUS 82.45-82.50 (Nov 2014) (82.5 Feb
2013)
- ZEROSET (as usual)
- CAL last/faint
- ENTER AP 0 X Y
The optical
configuration of the telescope is BROKEN CASS, to direct the light of
the WYFFOS
calibration unit via the nasmyth flat up to prime.
Focus (depends where you are looking!):
The best focus both on the WYFFOS detector and on the
fiducial fibre TV is 82.25 mm. However, to compensate off-axis
aberrations, the best focus in the outer parts (>=20 arc minutes
off axis) of the field may be as high as 82.65 mm. Hence a compromise
value of e.g. 82.45 mm is generally used. Fiducial stars right at the
edge of the 29 arcmin field will be elongated by as much as 3-4 arcsec!
The focus can be
checked by taking short AG exposures, and seeing if stars are round.
You might
want to make the focus best on the fiducials nearest the centre of the
field if
most of the science fibres are also near the centre of the field, i.e.
weight
the focus depending on where the science fibres are on the field.
On the mobile probe the best focus is at a position of
about 83.20 mm. This may be important to know when acquiring faint
sources with help of the TV, since the throughput is worse
than on the Autoguider. However,
for most targets, it won’t be necessary
to change the focus (and it’s recommended not to change it so as not to
forget
to change it back before the science exposures).
Autoguider:
AG5
See also
FibreGuider
Acquisition and Guiding Instructions
This camera looks at the output end of the 10 fiducial
fibre bundles, also called "fiducial fibres", each with a FOV of about
8" on the sky. Each indiviual bundle has 10 smaller fibres which carry
a proper image of the star to the camera. These fiducial stars will
be included in the configuration file (done by the observer beforehand)
and should
be 14-15 mag. The
astrometry must be VERY accurate in order
that several fiducial stars coincide with fiducial fibre positions AT
THE SAME
TIME. The 10 bundles are arranged in a rough circle with
numbers in this order: (clockwise from top) 144, 128, 96, 64, 16, 80,
160, 32, with 112 and 48 in the middle.
uDAS Autoguider commands and startup:
- Check that the switch box for the autoguider has to
be in position 4: (e.g. UDASDEV2 on whtdas18)
- On the DAS machine see DEWARS, log in
as 'whtobs'
- Type 'obssys' then 'startobssys' in the yellow window
- Then type 'startag AGX' where X is the number of the
camera being used
- Setup: Preserve during load (set all 3)
- To make the star move in conventional cursor-arrow
directions set in Zoom menu: Invert Y and 0
deg
- Region -> load region
-> choose the
most recent region file in /home/whtobs/AF2/OldReg/ag5_date.reg The
large circles are the FOV of the ficucial bundles (8”) and the smaller
ones are the size of the science fibres (1.6”).
- To shutdown the AG system use 'shutdownag AGX' where
X is the same as above
To start guiding WITHOUT FibreGuider (old method):
- Set integration time, probably a few seconds due to
the low throughput
- Set guide box size e.g. 75 pixels
- Choose a bright, round fiducial near the centre of
the configured field and note its fibre number
- Select 'Manual select guide star' in SDSU AG window
- Click 'Guide' and click on the fiducial you want to
guide on
- It may be necessary to enter 'AUTOGUIDE ON' (F9) on
the TCS
Note that the switch-box for autoguider has to be
set
to the corresponding autoguider!
Acquisition
TV: AG2
The camera looks at the output end of the mobile probe
fibre bundle and
can be moved in front of fibres to pick up stars. The FOV is
approximately 20" x 30". The mobile probe is used for acquiring,
especially standard stars on individual fibres and science fields if
the telescope pointing is not good enough to see the fiducials in the
fibres. With good pointing you may try to acquire science fields
directly with the Autoguider. On the mobile probe the best
focus is at a position of about 83.20mm.
uDAS TV commands and startup:
This is the same as for the uDAS Autoguider. The TV is
called AG2 (see DEWARS
for the
DAS machine number).
- On the DAS machine, log in as 'whtobs'
- Type 'obssys' then 'startobssys' in the yellow window
- Then type 'startag AGX' where X is the number of the
camera being used, e.g. AG2
- Setup: Preserve during load (set all 3)
- Set up a window to view the mobile probe fibre,
typically:
SYS> window AG2 1 "[485:860,275:620]" (Oct 2015) (was "[155:515,25:490]" in Nov 2014 and "[460:900,65:460]" in May 2015) which can also be set using the Camera menu
- To get the same directions as the conventional
arrows, set in the Zoom menu:
INVERT X (ROTATE 90 is no longer needed)
- Display the most recent region file in
/home/whtobs/AF2/OldReg/af2_ag2_date.reg,
marking the rotator centre (RC) and the gripper centre (GC)
Atmospheric Dispersion Corrector:
Check the PF atmospheric dispersion compensator is in 'ADC Only mode'
(top right of prime mimic on ICS). If in doubt type:
- SYS> PF_MODE ADC_ONLY
- SYS> ADC_AUTO ENABLE
Other screens and consoles:
- The AF2 TV screen (little monitor above VCR) is used
to view the back illuminated fibres when a new field is set up. You see
the white spots defocussing as the robot picks the fibre up.
- Video Recorder. Used to record each new configuration setup in case of problems with fibres not being found etc.
First Night Tasks
Rotator
Centre (RC)
- Make sure
that CAL LAST, STATION and INSTRUMENT are set correctly
- Mark the TV
region, if not already done, which should
cover the active (i.e.
brighter) area of the mobile probe coherent fibre bundle. You can use
the last known region and correct it if necessary. Make a note
of the new region
- Move to a 12th mag. star (e.g. ft22+30
etc from the pointing grid)
- USER>ROT
SKY 0 (or 180, or
any value you like)
- Start the TV in
continuous readout, viewing mobile probe
- SYS> af2
wake
- SYS> af2
viewsky 0 0 You
could also start
with using the viewsky X Y found last time (which may be 0 0 anyway). It’s possible
that the RC will be too far from the centre of the TV and you will need
to choose suitable X Y values so that the RC is closer to the centre of
the mobile probe. This will ensure that when you rotate by 180deg you
will see both positions of the star. You will have to see how it moves
when you rotate.
- When in
position measure x and y pixel positions of the star
- Rotate by 180
degrees, then measure x and y pixel positions again
- If necessary, to keep the half
circle on the mobile probe, move the star towards the rotator centre
using the XY handset, to reduce the radius of the circle the star
describes while rotating.
- Calculate
the new rotator centre (see HERE for the
most recent values)
- Mark the
rotator centre and save the region file for future reference and write it in the logbook
7-Star
Calibrate
- SYS> af2 viewsky 0 0 (or X Y, using the same
values as before to view the rotator centre)
- USER> ROT MOUNT 'angle' (to stop the rotator
moving and avoid problems with the rotator limits)
- USER> CAL FAINT
- TV in continuous readout, viewing mobile probe
- Centre up all stars on the rotator centre and hit
HANDSET after each one is centred
Gripper Centre (GC)
This should always be done on the first night, but it is usually also
checked on subsequent nights, maybe once a night, or more often if you
have acquisition problems (especially for standards). The gripper
centre is needed to acquire a standard star on an AF2
science fibre,
correcting for a possible offset between GRIPPER centre and MOBILE
PROBE centre and also for a possible small displacement of the
mobile-probe fibre at the AG CCD end. It is also used to find fiducial
stars if the pointing is not good enough to see them directly.
- The rotator centre should have been found already and
the 7-star
calibrate done too.
- You must have a fiducial fibre somewhere in the field
to determine the
gripper centre.
- If you have a configured field setup (AFSETUP already
done) then this
will be the case.
- If there is no field
already set up, you can still find the gripper centre by placing just
one fiducial fibre at the centre of the field:, e.g. to move fibre 80:
SYS>
AF2 movefibre
80 0
0 moves fibre 80 to position 0,0 and
you can find the gripper centre here,
using Sky PA 0 (or any Sky PA).
To determine the gripper centre:
- USER> gocat 'standard star' e.g. one from the
pointing grid will be fine
- rot sky XXX (if it's a configured field you need to
use the specified Sky PA)
- Move the star to place it under a fiducial fibre -
choose one near the centre of the configured field, or the one that you
have placed at the centre:
- SYS> af2 wake
- SYS> af2 offsettel SKYPA STARNAME
FIDUCIALFIBRENR
- Answer the questions (first 'n' then 'y') - this offsets the t/s to put the star down the
fiducial fibre and moves the mobile probe to see this fibre
- Centre the star on the TV where you think the gripper
centre is. Try using the most recent value, or one from the previous
run, or if you have no idea then use the rotator centre
- SYS> af2 park (otherwise you won't see the
star on the autoguider)
- Centre the star well on the fiducial fibre on the
autoguider
- SYS> af2 viewobject FIDUCIALFIBRENR (same
fiducial fibre as above)
- See where the star ends up on the TV
- Mark this position as the new gripper centre and
save the region if required
- See HERE
for the most recent values and some old ones
Aperture
Offset Setup
Using
a
multi-object instrument the aperture 0 offset should be defined , so
the field
rotates around the instrument centre. In very old
notes, the instrument
centre was
defined as the centre of the mobile probe, but this seems at least
arbitrary
and probably incorrect. The real centre of the instrument is the GC,
this is
the point where you want to acquire stars onto. So by moving a star from
the RC to
the GC you will measure the required aperture offset and everything
will
be
centred on the GC rather than the RC. This AP 0 can be left in the TCS
for
all the
run.
Usual method:
- go to a
pointing grid star e.g. ft20+22
- SYS>
AF2 viewsky 0 0 (assuming you are able to view the rotator
centre like this)
- centre the
star
on the rotator centre with the HANDSET in X_Y mode
- Using
HANDSET
in APOFF mode, move star to the GC, then exit HANDSET mode
- USER>
store ap 0
Alternative method, if you need to use a VIEWSKY X Y (not 0 0) to view
the rotator centre:
- go
to a pointing grid star
- SYS>
AF2 viewsky X Y
- centre
the star on the rotator centre
- move the mobile probe
in steps of e.g. 300
to af2 viewsky 0 0 while maintaining the star on the rotator centre
using
HANDSET in APOFF mode, then exit HANDSET mode
- USER> store ap 0
- Test by going to
another star, which should return close to the previously marked
rotator centre
(within normal telescope pointing error) and when rotating should
describe a
circle around this
If
a known good fiducial fibre can be placed on the instrument
centre (which is NOT possible if a field is setup), you can use this
method, which also finds the gripper centre:
- go to a pointing grid star
- SYS> af2 viewsky X Y (same as before)
- centre the star on the rotator
centre
- Move the mobile probe in steps of e.g. 300 to af2
viewsky 0 0 while
maintaining the star on the rotator centre using HANDSET in APOFF mode
- park the robot and centre the star on the
fiducial
fibre
- USER> store ap 0
- SYS> af2 view sky 0 0.
- mark
the star position as the gripper centre
Acquiring
a configured field
It is
recommended
to GOCAT to the field position BEFORE doing the fibre setup. For
reconfiguring or for
parking fibres, it’s OK for the t/s and rotator to be tracking, but not
slewing.
Also it’s recommended to do it at el >45 (in case the fibres
fall down). The
AF2 TV screen is used to view the back illuminated fibres when a new
field is
set up. You see the white spots defocussing as the robot picks the
fibre up. The
astrometry used by the observer to generate
the configuration, must be accurate in order that several fiducial
stars coincide with fiducial fibre positions at the same
time.
- GOCAT to the field and check for rotator limits
- Set the Sky PA and AP 0
- The observer must then run AF2 SETUP to configure the
field. This takes about 15 minutes
- Centres of the Fiducial Fibres:
The fibre positions and/or shapes on the AG
camera change with time, perhaps they depend slightly on EL. Before
acquiring a new field check and if necessary move the marks of all
fibres, illuminating the fibres using:
- SYS> wcallamp He (W, Ne or Hg are other
options) or SYS> wcallamp 4 (4=He)
- The regions should then be saved to the file
/home/whtobs/AF2/OldReg/af2_date.reg,
using Region -> Save
Quick
acquisition when the pointing is very good:
- The
telescope pointing must be reasonably accurate (Calibrate Sky RMS
<6" approx.) to put the fiducial stars directly into the fibres
without any offsets.
- If it's not good enough, do a short spiral search with a step size of 10" with X_Y handset mode
- You can test the pointing on a bright pointing grid
star by putting the "mobile probe" in the center of the field using AF2
VIEWSKY 0 0.
Moving this star onto the GC using handset will tell you
the pointing correction. If the
pointing star is close
to the target field, you can apply this correction at the field
position and the fiducial stars should fall into the fields of view of
the fiducial fibre.
- A rotator offset must be applied. If the
pointing is accurate (or the above correction is applied) then fiducial
stars close to the centre of the field will show up in the
corresponding fibres. If there are no fiducial stars close
to the centre then you may need to move the rotator about -0.2 degrees
using the HANDSET.
Wait for 3 readouts of the acquisition camera to see the updated
position.
- use FibreGuider
to complete the acquisition and start
guiding
- af2 sleep
Longer acquisition
when the pointing is not good enough to put the fiducial stars directly
into the fibres using the above method. This uses the larger field of the moving
probe to first
get a fiducial star close to the correct position, i.e. on GC
(and
it helps to find the rotator offset from scratch, but we don't use this
method because the offset is always close enough to -0.2deg).
- SYS >AF2
WAKE
- To acquire,
move the robot to a bright fiducial object close to the instrument
centre:
- SYS> AF2
VIEWOBJECT#
- you should see
the star on the TV
- centre the star
with the XY HANDSET on the GC.
- (optional step,
not needed) Now move the mobile probe to another fiducial star at the
edge of the field; this time move the rotator to centre the star as
well as possible, then park the robot
- SYS > AF2
PARK, now you should see most of the fiducials in the
fibres on the autoguider
- use FibreGuider
to complete the acquisition and start guiding
- SYS > af2 sleep
Acquisition
and Guiding with FibreGuider
A new acquisition tool for AF2, FibreGuider, was written
by Richard Bassom in semester 2013A. It was written to enable more
accurate and repeatable acquisition with AF2 and WYFFOS. It calculates
the required XY translational shift and rotation to best centre all
stars in the fiducial fibres. A brief outline of how to use the tool is
given below:
- first use the above acquisition procedures to ensure
that at least 3 (or maybe even just 2) fiducial stars are seen in their
fibres
- start the acquisition tool:
DAS> fibreguider &
at the fiducial AG DAS prompt
- stop the TV
- in the Acquisition Tab click 'Calculate' to take
an image and automatically determine the required shift in
XY and rotation
- then with the three checkboxes (apply XY, rotation
and use TCS guide) ticked, click 'Apply'. This
will send the rotation and XY offsets to the TCS as a TWEAK and then it
takes another image
- repeat as required so that the XY and rotation
offsets are <0.01 degrees for rotation or <0.5" for X
and/or
Y)
- then in the Autoguider Tab, start the
autoguider guiding on the arbitrary position 250 250 with GUIDE. You
should see
these commands arrive at the TCS.
- when the guiding RMS stops decreasing, you are ready
for the science exposures
- if you need to stop guiding (e.g. for arcs), click
STOP in the Autoguider Tab
- to begin guiding again click GUIDE, which will
gradually bring the fiducial stars back into position - check that the
guiding RMS is as low as it can get
If you don't see the fiducials just after the gocat, you can press the
Spiral Search button in FibreGuider and it will stop every time the
software finds a star inside the fiducial regions (or hot pixels). You
can then continue with the search or stop it. However this is not
efficient yet. It is a lot quicker to try and move a bit with handset
(only a few tries) and then wake the robot and see the mobile probe on
the acquisition TV.
If you happen to need a spiral search using the acquisition TV, this
button is useful since you can select the offset you want and it's
easier to perform a spiral search without human mistakes, although you
always have to continue/stop the search since this is not implemented
in the software and can either stop with hot pixels or not stop even
if you have found the star close to the fiducial fibre.
Acquiring
standard star onto
science fibre
A
configured field
will already have been set up before doing standards. There is no
guiding for
standards, as there won’t be any guide stars located in the fiducial fibres.
In the
following steps, the detour via a fiducial
fibre is to check or re-determine the GC, as the fiducial fibres have
the same
optical centre as the science fibres; this way you cannot miss the
standard
star.
- USER>
gocat star
- USER>
rot sky xxx
- SYS> af2 wake
- SYS>
af2
offsettel skyPA standardname fiducialfibre#
Answer the questions (first 'n' then 'y', since the first 'y' would do another GOCAT) this
moves the star from the centre of the
field onto one of the fiducial fibres (preferably close to the
centre of the FoV)
- centre
star on
the GC using the handset
- SYS>
af2 park
- move
the star to
the centre of the fiducial fibre using the HANDSET
- SYS>
af2 viewobject#
to
view this fibre on the TV
- mark
this
position - it’s the new GC
- SYS>
af2 offsettel skyPA standardname
sciencefibre# this
moves the star to
put it down science fibre
- Answer
the questions
first ‘n’ then ‘y’ (NB: if you say ‘y’ to the first question, it will
do a
GOCAT).
- recentre
it on
the gripper centre
- SYS>
af2 sleep
Repeat
just these
last 4 steps to put the same standard star down different science
fibres as
required
Then
to go to a different standard star:
- SYS> af2
offsettel SKYPA
STARNAME SCIENCEFIBRENR
- Answer the first question with 'y', which does a GOCAT
- Centre the star on the TV on the gripper centre
- Then answer 'y' to the second question. The telescope
will offset to put the star in the fibre.
- Centre
the star again on the TV on the gripper centre. This second recentering
will
be more pronounced for fibres further from the field centre.
Bad pointing (guide stars not found)
If
the pointing is too bad
even to see the
star using the long acquisition method, first check the obvious (petals
open, check t/s focus, check encoders) then put the "mobile probe" in
the
center of the field with AF2 VIEWSKY 0 0. GOCAT
to a pointing grid star which is very
close to your field. Then move this star onto the GC and the offset will be the
approximate pointing correction.
Since the star is
close to the target field, you can apply this correction at the field
position
and the fiducial stars should fall into the fields of view of the
fiducial
fibre.
Alternatively,
if you
can't see the fiducial stars, perform a spiral search. In this
case it
is
recommended to re-define the gripper centre on the mobile probe.
Arcs
When you take arcs, either
offset the
telescope away from the object or close the petals, as
otherwise
you get the two signals superimposed.
Sky Exposures
- stop guiding by pressing STOP on FibreGuider
- offset t/s as required
- take sky exposures
- offset back to the original position
- press GUIDE on FibreGuider, to pull the fiducials
back into position
AF2 Commands
For a full list of AF2 commands, see here.
These are a few of the most useful commands:
SYS>
AF2 WAKE (turn on the robot so it can be used for acquisition)
SYS> AF2 PARK (move the robot to its parking position at the edge)
SYS>
AF2 SLEEP (move the robot to its parking position at the edge AND turn its power off)
SYS>
AF2 VIEWOBJECT 112 (or any of the fiducial fibres)
SYS>
AF2 VIEWSKY 0 0 or VIEWSKY X Y (view a particular area with the TV)
SYS>
AF2 MOVEFIBRE 16 0 0 (to place fibre 16 at the
centre, 0 0 position)
SYS> AF2 OFFSETTEL (for doing acquisition)
Rotator
Limits
The Mount PA has a range of -163.37 to 193.63, so there is a blind spot
of 3 degrees. It is useful to be able to determine the time at which a
rotator limit would be reached for a new field, without having to move
the telescope and read the information off the TCS. This can help to
plan the observations during the night.
To calculate when a rotator limit will be hit
- Use Staralt to plot the Sky PA during the night for
the proposed field
- If the parallactic angle is increasing throughout the
observations, the rotator will be moving towards a negative limit
- If the parallactic angle is decreasing throughout the
observations, the rotator will be moving towards a positive limit
- Use the formula:
Parallactic Angle = Sky PA - Mount PA
- Given the Sky PA of the observations, and the Mount
PA of either the positive or negative limit, obtain the parallactic
angle for the time at which the rotator limit will be reached
- Use the staralt plot to read off the time for this
parallactic angle
To determine if a rotator limit will be hit
for fixed time observations
For a planned observation with fixed Sky PA and for a definite start
and end time, we can determine in advance if a rotator limit will be
reached during the observations:
- Use Staralt to plot the Sky PA during the night
- Read off the parallactic angle for the start and end
of observations
- Use the formula:
Mount PA = Sky PA - Parallactic Angle
- Make 2 calculations, one using the parallactic angle
at the start of observations, and one at the end
- Obtain the Mount PA for both these times: if it falls
within the permitted rotator range then no limit will be reached
AF2
GUI
Troubleshooter
If a fibre gets "lost"
you have to move the t/s to access park: Move first to AZ
300, EL
15; Switch to ENG; Press AP2 on platform; Open
gate; Press AP3 on platform
Then follow the instructions on
the AF2 main
page
Old Parameters
Gripper centre
(viewsky 0,0)
|
172,213
181,221
151,219
82,239
|
21/11/05
17/08/05
20/04/06
21/02/13
|
Rot. Center Af2
viewsky -600,500
viewsky 0,0
|
148,116
202,208
192,174
59,247
|
21/11/05
17/08/05
20/04/06
21/02/13
|
Telescope aperture '0'
|
0.6,8.9
|
21/11/05
|


