| |||
|

| Home > Astronomy > Telescope Operator Notes > New RoboDIMM Finder |
|
| |||
|
| Home > Astronomy > Telescope Operator Notes > New RoboDIMM Finder |
New RoboDIMM Finder
A second finder scope (Orion 50mm wide-field autoguider) has been piggy-backed on the RoboDIMM main scope. This wide-field finder is equipped with a small format CCD camera giving a FOV of 2.2 x 1.7 deg and pixel scale of 6.1 ''/pix. The purpose of this is to allow recovery of the telescope pointing without having to go to the tower at night. Recovering the pointing of RoboDIMM
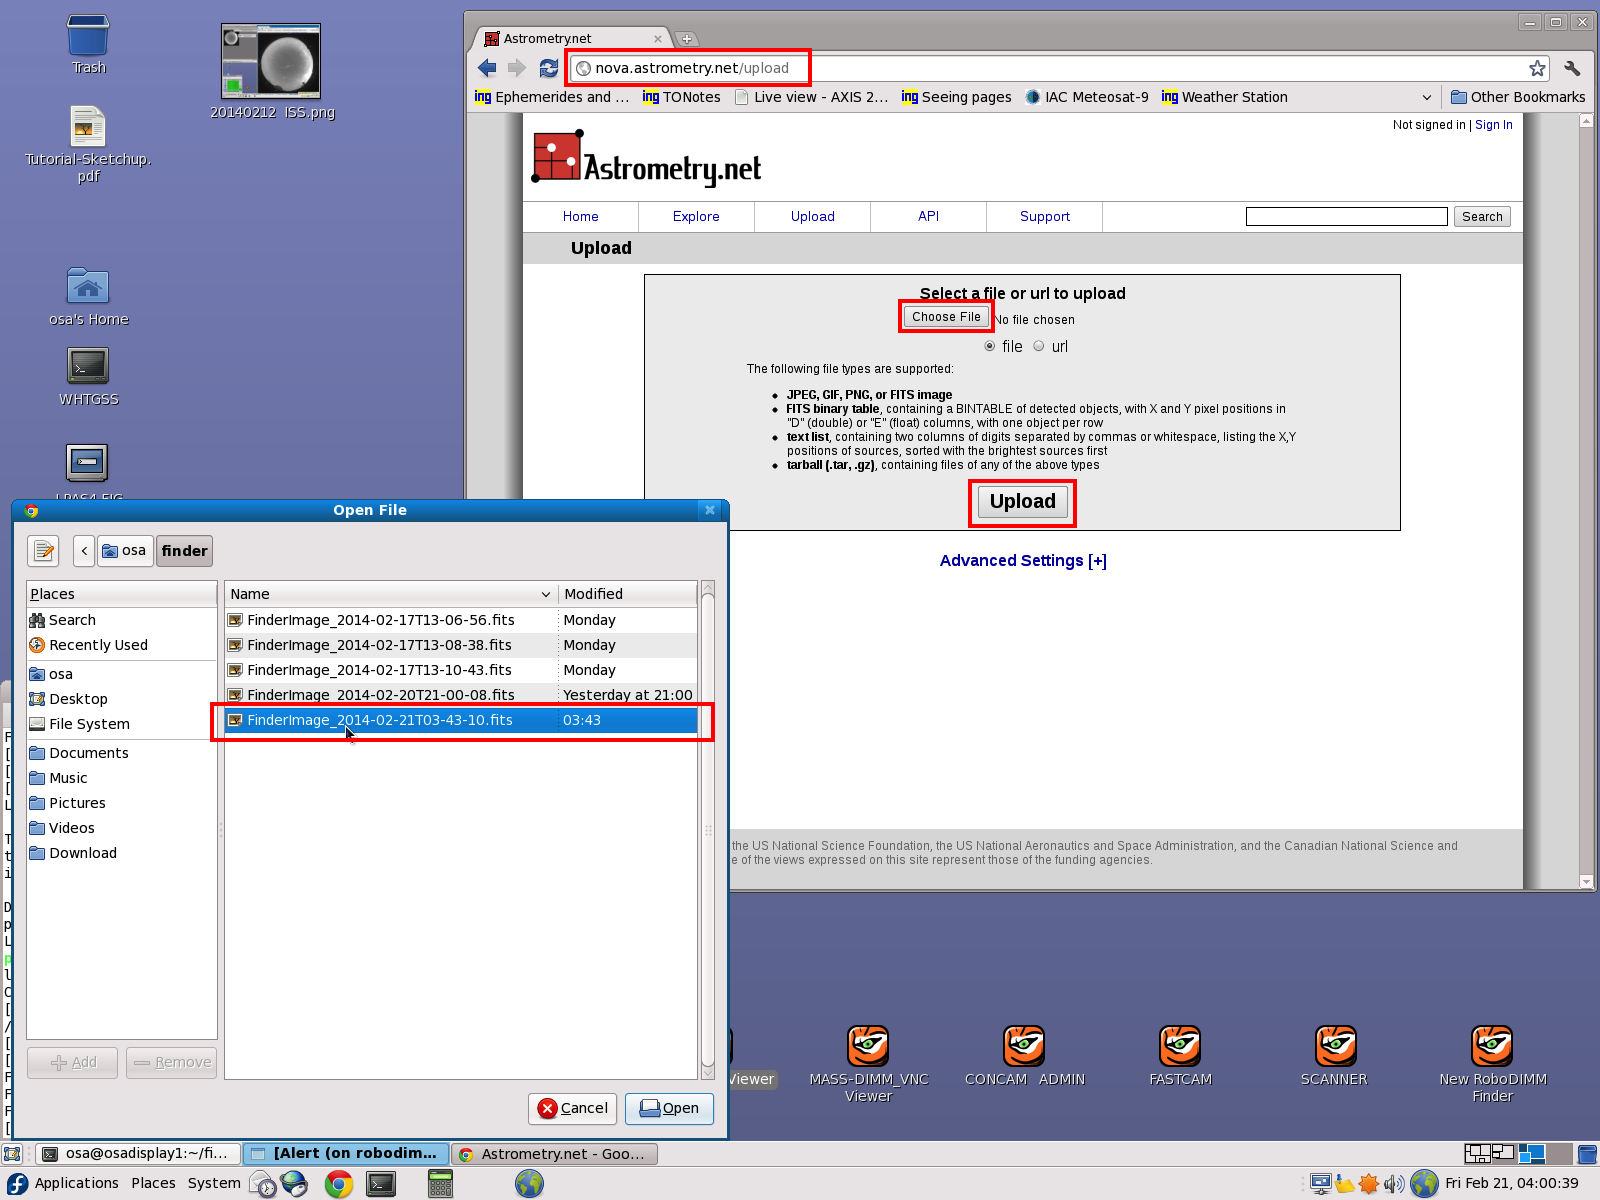
If you suspect the pointing of RoboDIMM is off slightly or has been lost, follow the steps below to first check the pointing, and then recover it if needed. If the telescope has run into a limit this process will not fix it. Manual attention will be necessary as before. Start the RoboDIMM in manual mode using:> ./robodimm -m Then in a new terminal connect via telnet using: > telnet robodimm 3505 Find a suitable star up high to test the pointing from the list by: telnet> selecttarget 40 Unpark the telescope using: telnet> resume Then slew to the chosen star: telnet> goto saoXXXX Once there, log in to the Rasberry Pi which controls the new finder camera. To do so, open a terminal on osadisplay1 and type: > ssh pi@finder Logging in from osadisplay1 will not require a password. Logging in from other machines will. The password will be distributed via email. If you cannot ssh onto the Rasberry Pi or the connection is refused it can be power cycled on the massdimm PDU, outlet "FinderCamera". Simply switch off the outlet, wait a few sec, then switch it back on again. Wait approx. 2 mins for the Rasberry Pi to boot up. Once logged on to finder, start the camera software: pi@rasberrypi> startindi INDI is an open source observatory control program, we use it here to communicate with the camera to take images. Starting INDI will return some text to the terminal. Everything is working properly if you see: "QHY CCD QHY5.CCD_GAIN.GAIN=10" towards the bottom of the output. To take an image type: pi@rasberrypi> image ExpTime where ExpTime is the exposure time in seconds. 10s is usually fine. Again INDI will return some more text to the terminal and once the image has been read out it will be copied from the Rasberry Pi to /home/osa/finder/ on osadisplay1. The images will be saved as: "FinderImage_DateTTime.fits" where DateTTime is the time and date of the image. Upload the image to http://nova.astrometry.net/upload to solve the astrometry and find the real pointing centre of the RoboDIMM. See images below:
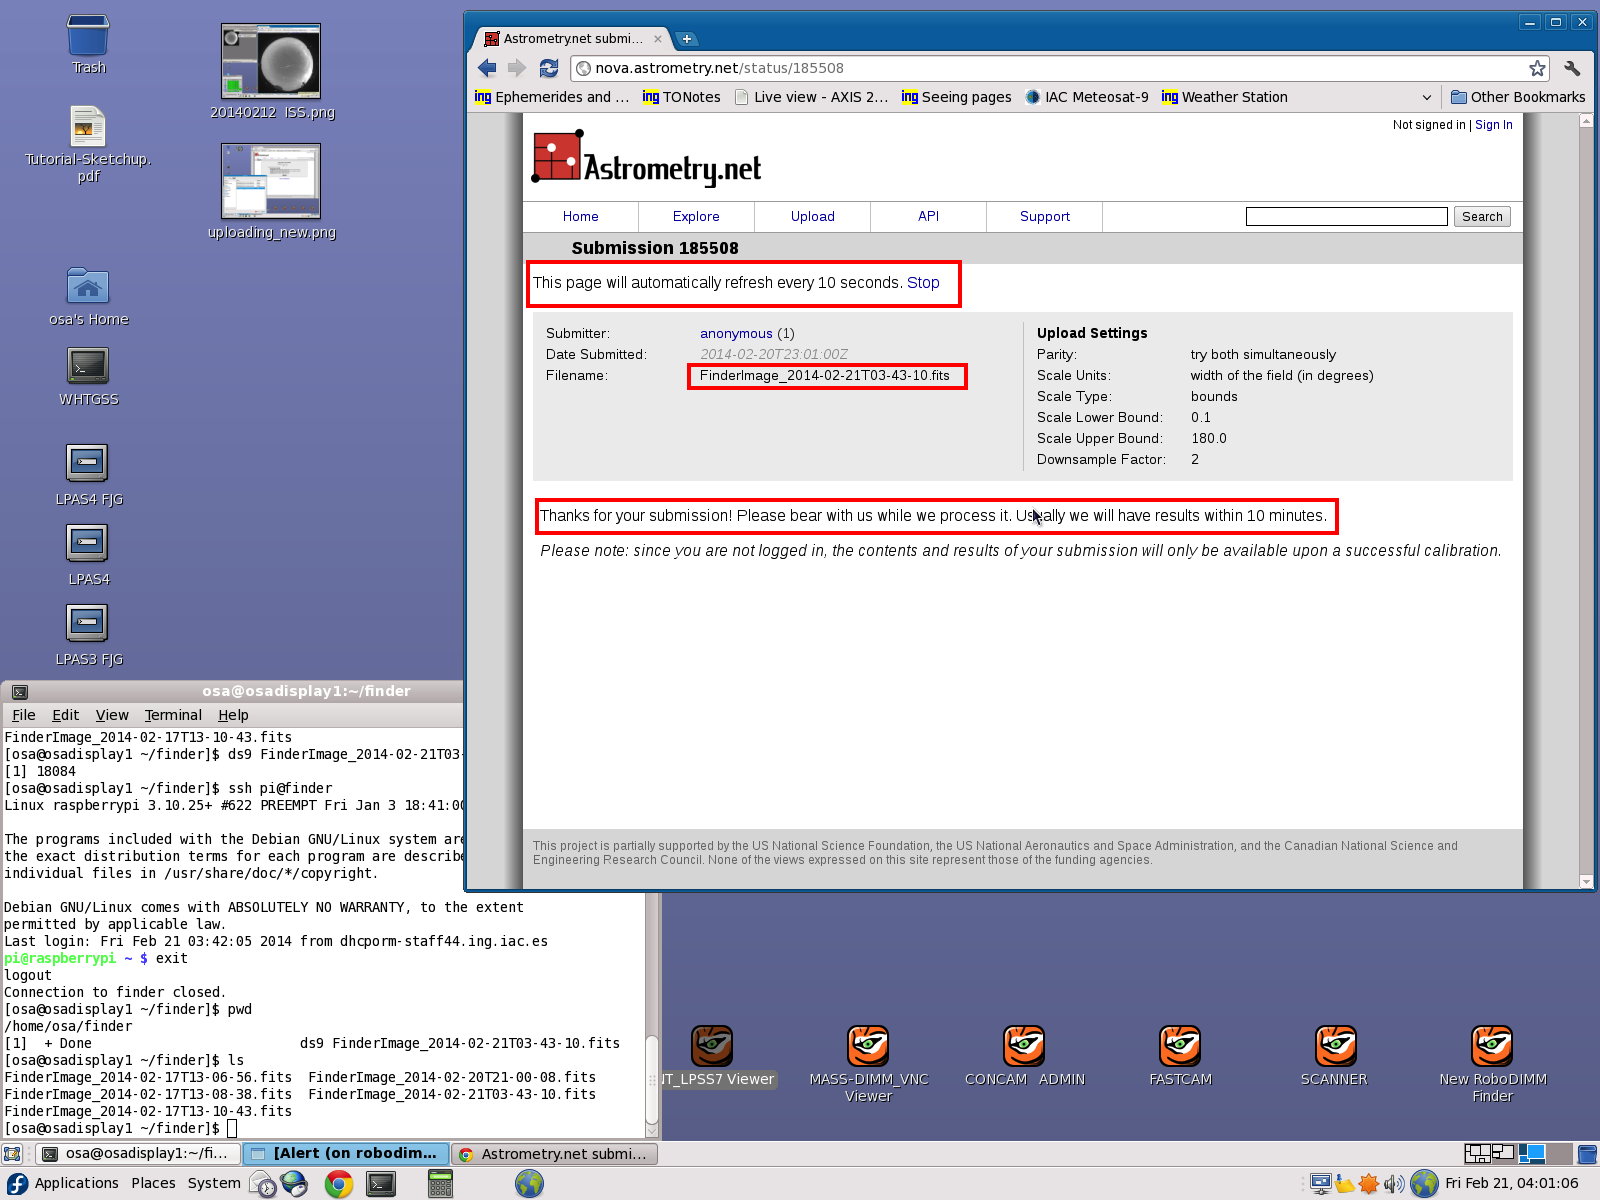
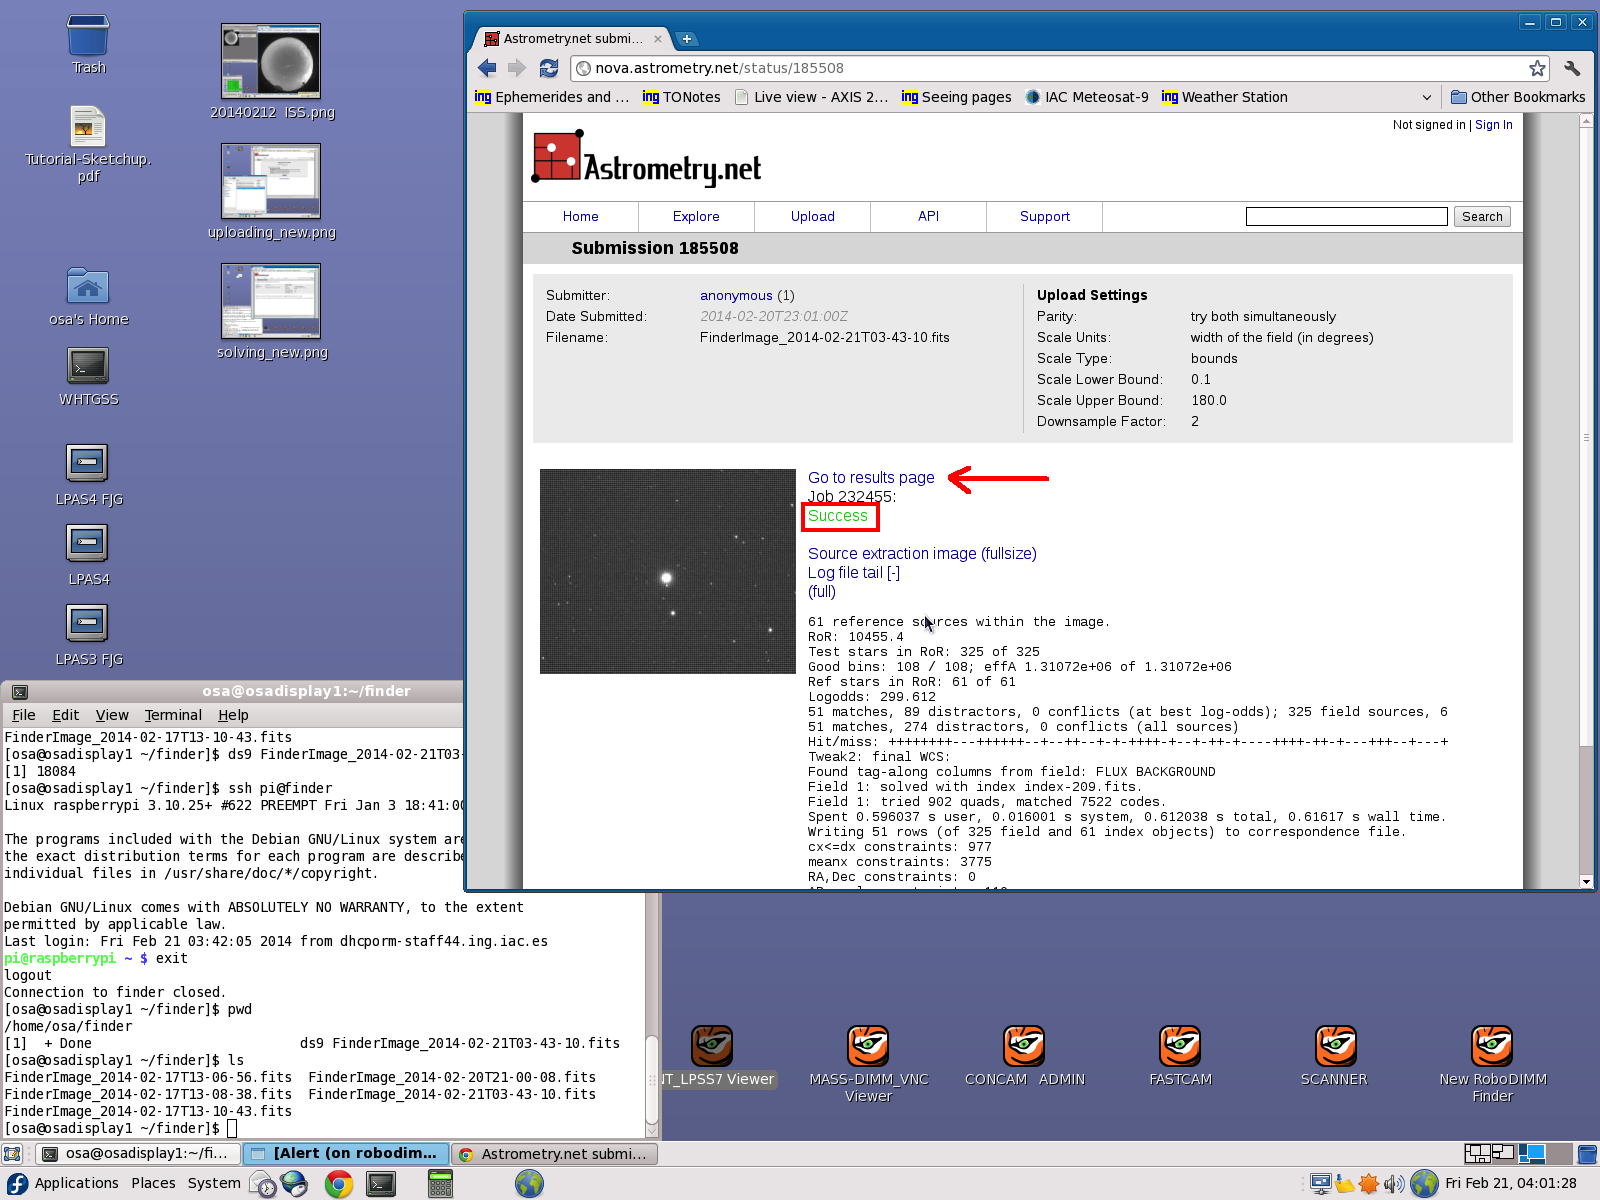
Once uploaded the image will be solved by Astrometry.net and the page will refresh automatically every 10s. This should take ~20-30s only (the web page says up to 10 mins but it is usually much faster). Once the image has been solved check the results to get the pointing of the RoboDIMM. Click the "Go to results page" link to see the solution. See images below:
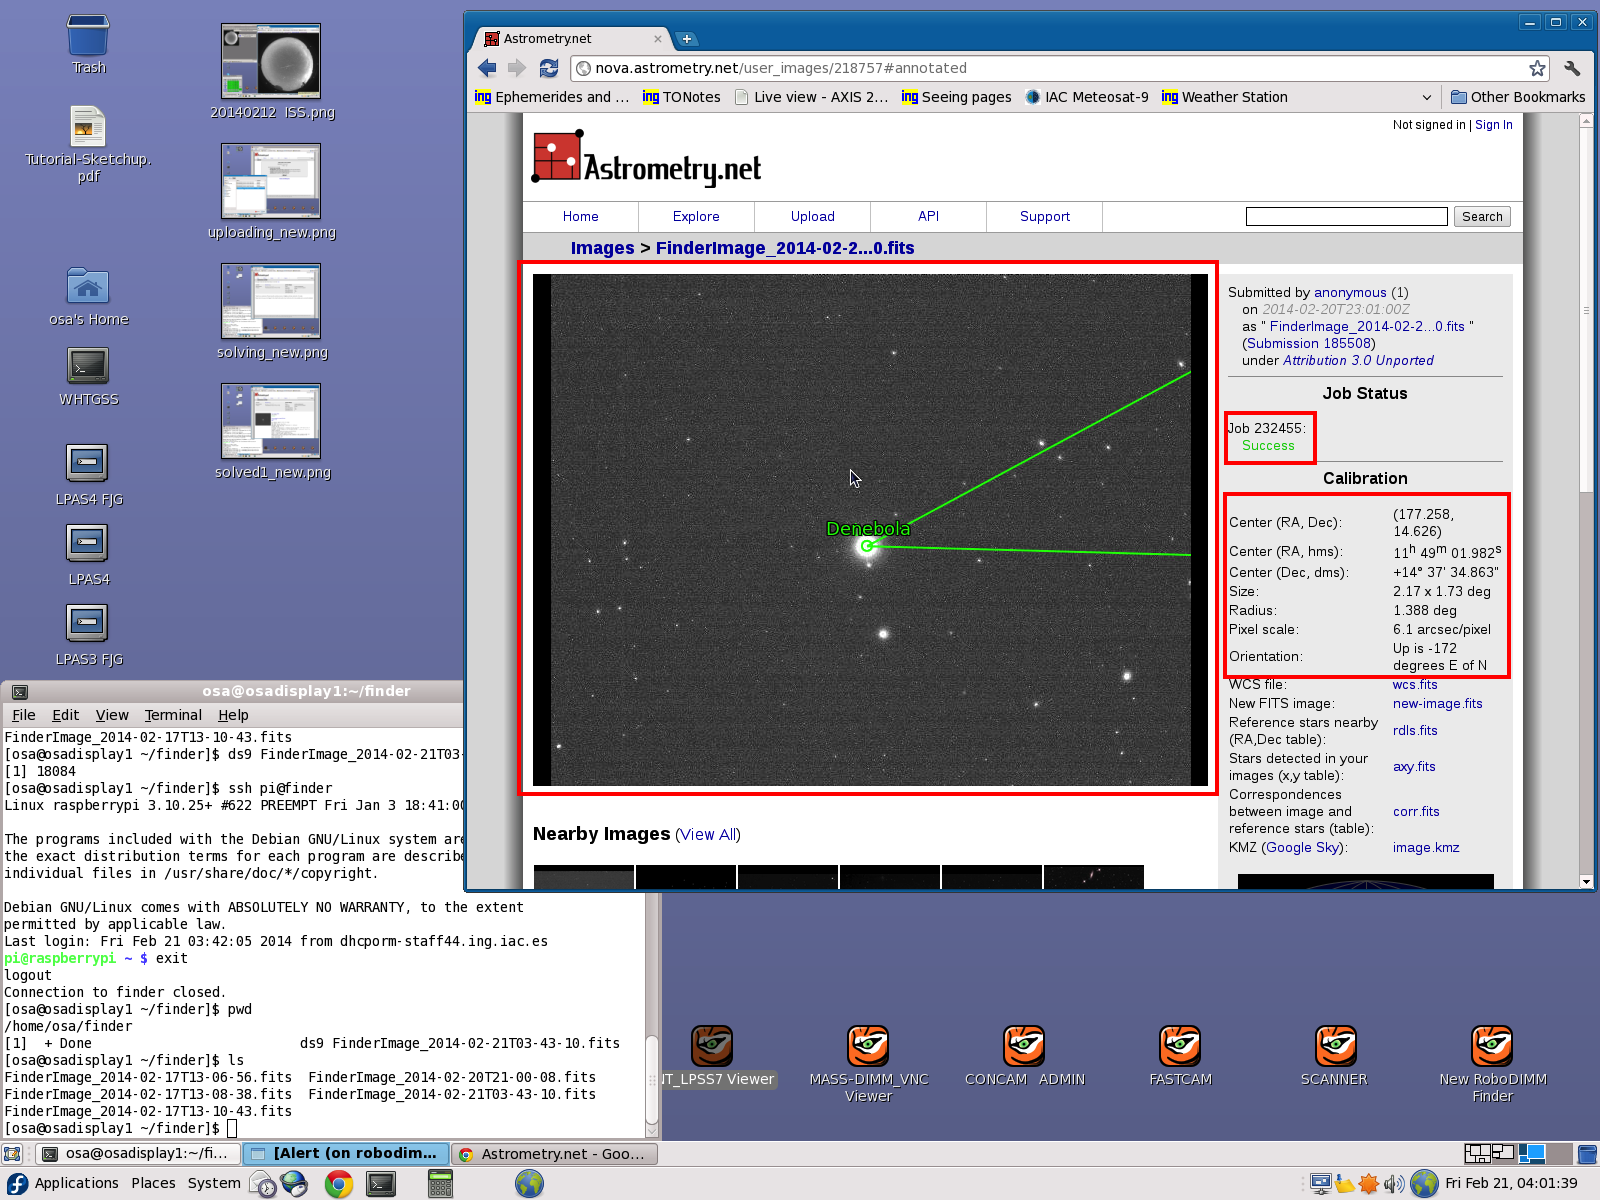
Note these coordinates and enter them in the RoboDIMM telnet prompt as: telnet> sync 11:49:01.98 +14:37:34.86 This will tell the RoboDIMM where the telescope is really pointing. Now you can retry the goto command from above to slew the telescope to the actual target. telnet> goto saoXXXX Once there, check the pointing with the new finder camera again. Take a new 10s image. pi@rasberrypi> image ExpTime Open the image in ds9 on osadisplay2 (or repeat the uploading to http://nova.astrometry.net/upload). A bright star should be located very close to the centre of the image. If not, try repeating the steps above. NOTE: The example shown in the images was taken when the pointing was good, hence the star (Deneb in this case) was right in the middle. If the pointing is bad you might not see the bright star on the image. However, astrometry.net will use the fainter stars in the image to determine the field centre regardless (provided there are at least 10 fainter objects in the image). If a bright star has been found, do the following at the telnet prompt: telnet> park telnet> shutdown This will park the telescope and quit manual mode. Now start the robot as normal and the telescope pointing should be recovered. Once the pointing is recovered shut down the finder camera on the Rasberry Pi via: pi@rasberrypi> stopindi pi@rasberrypi> exit |
| Top | Back |
|