ING Banner
Home > Astronomy > Telescope Operator Notes > Working with New PFIP

WORKING WITH NEW PFIP

PFIP (Prime Focus Imaging Platform) is currently undergoing major changes to the camera hardware. This page is likely to change frequently as commissioning progresses.

The documentation for the old PFIP camera can be found here

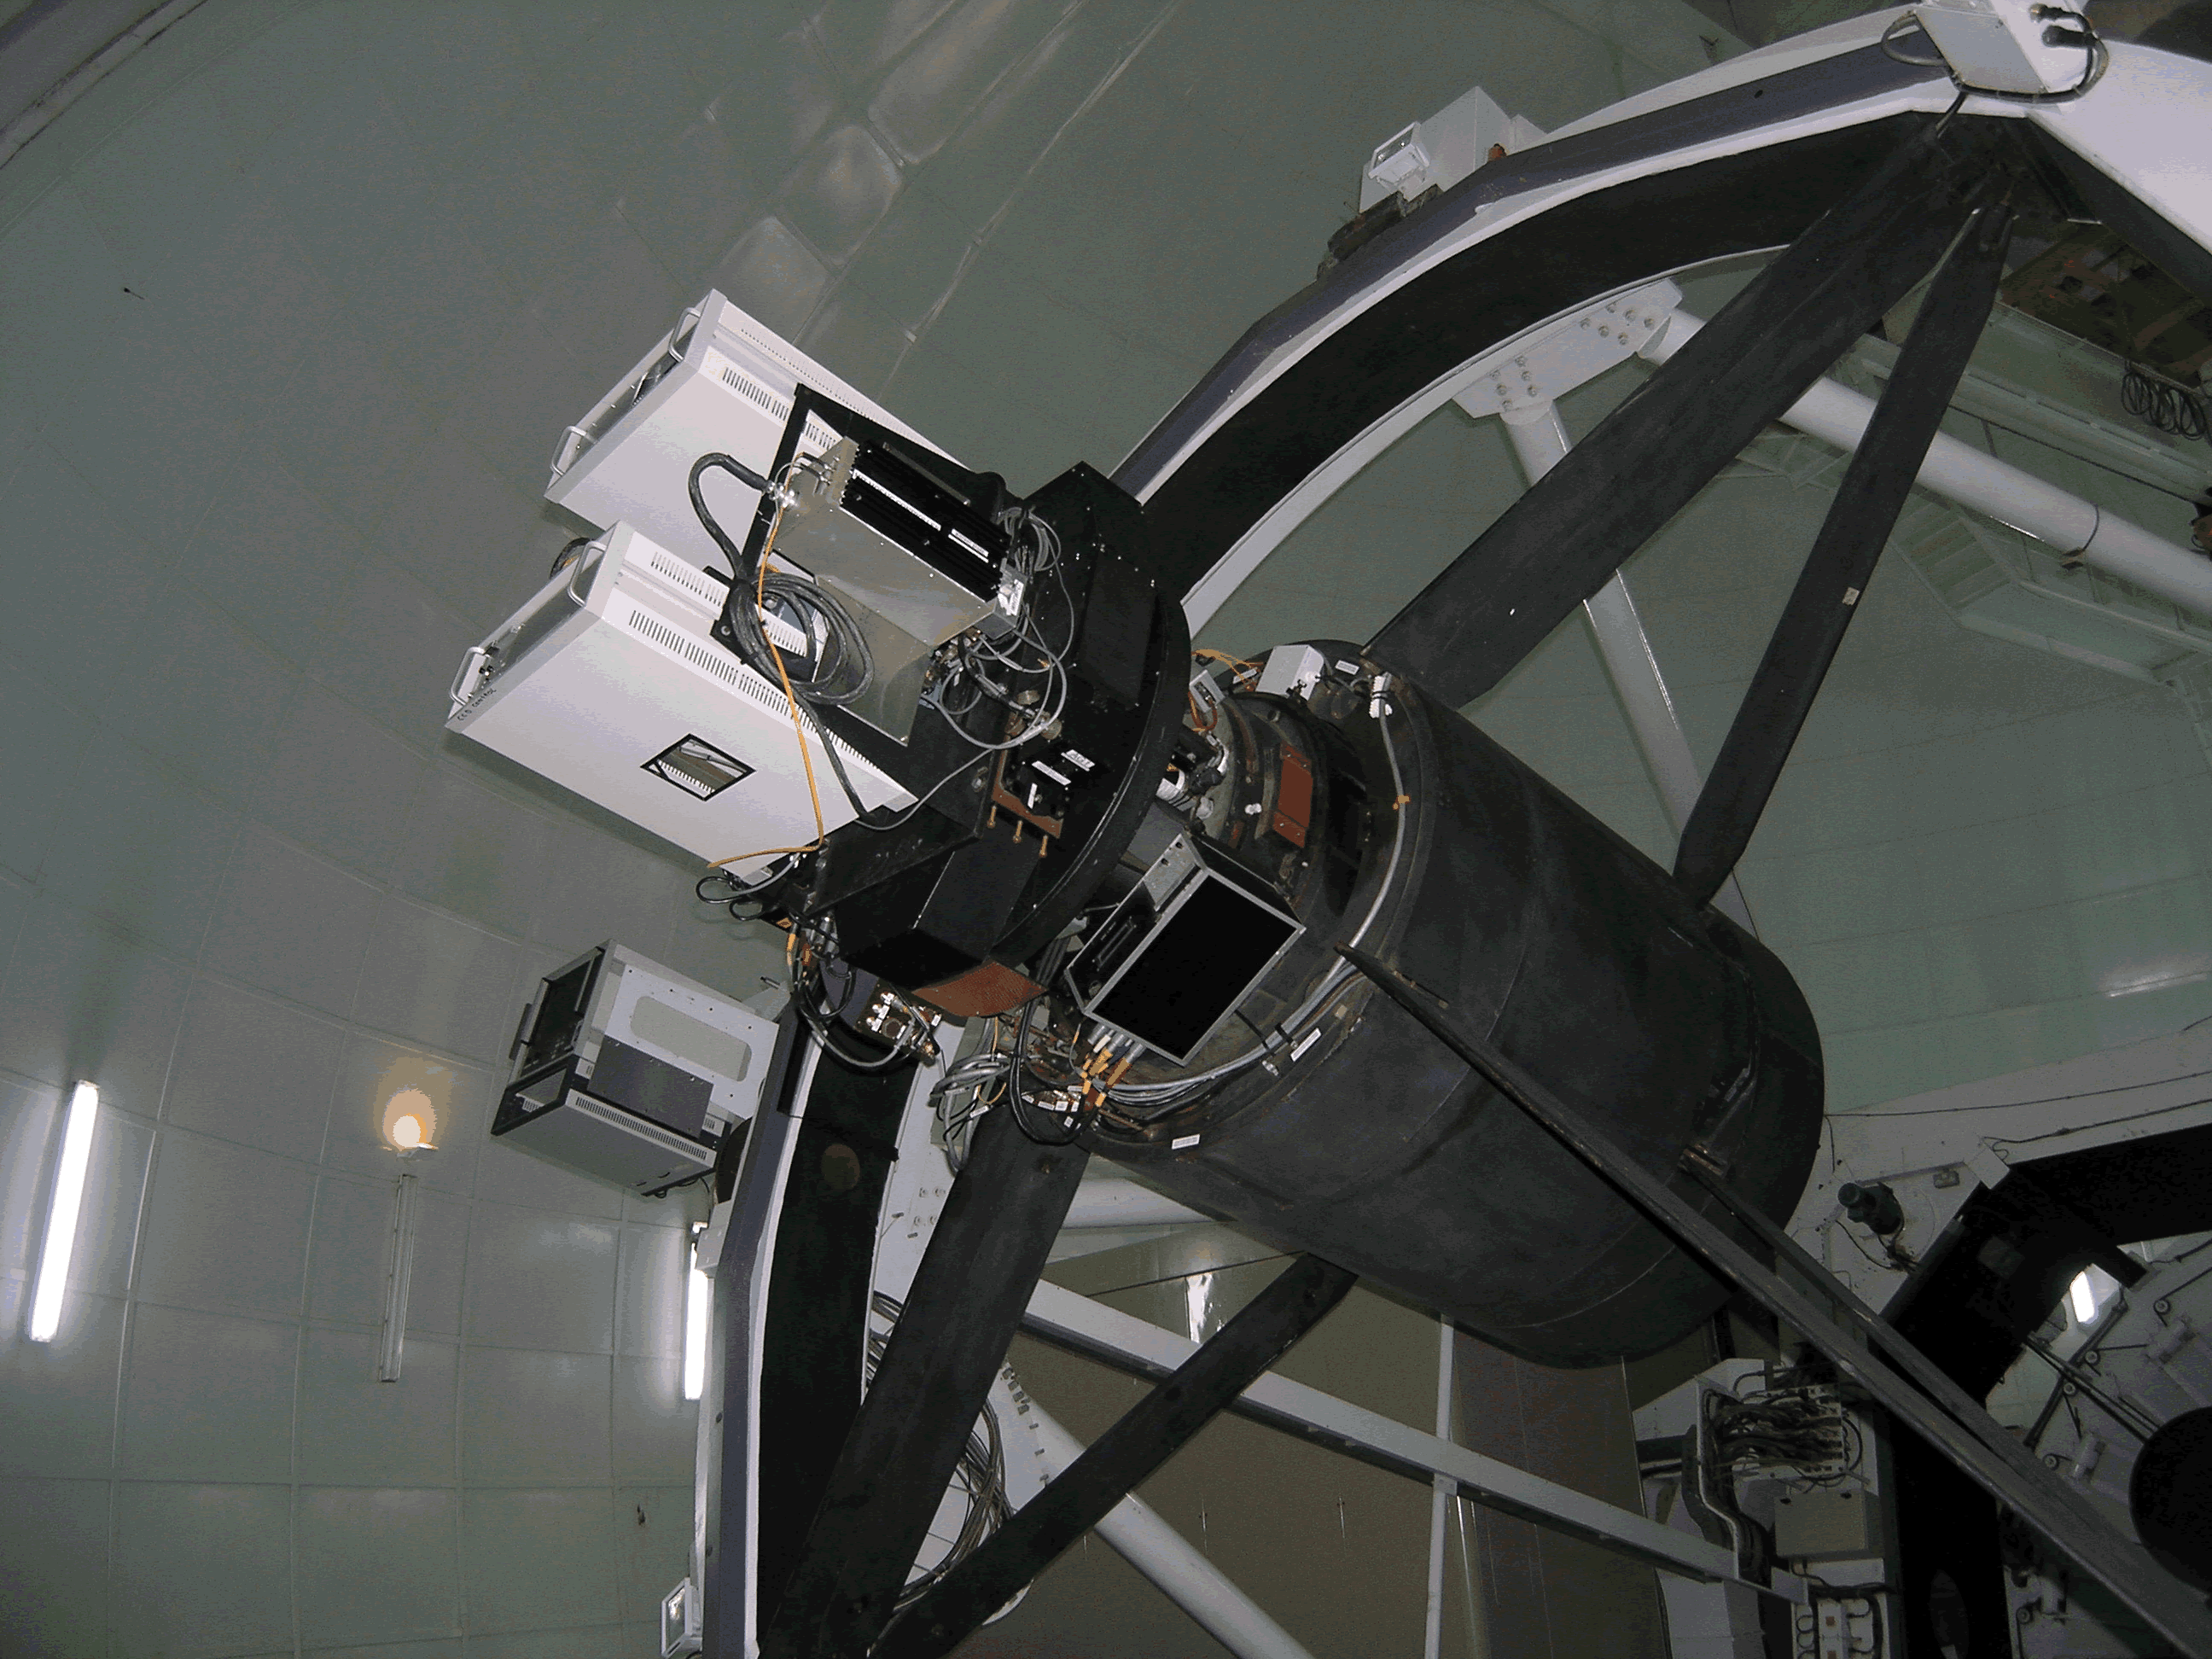
The new PFIP camera consists of an e2v, 4k x 4k CCD with increased QE at red wavelengths (peaking at 900nm). The FOV is increased to 18' x 18' with a pixel scale of 0.27 ''/pix. More information on Red+4 can be found here. PFIP is an imaging platform that replaces the secondary mirror.

Startup

TCS:
  • USER> STATION PRIME
  • USER> INSTRUMENT PFCCD
  • USER> AGSELECT PRIME
  • Zeroset AZ and ALT

To zeroset on the targets switch to computer control:
  • USER> AZ 298
  • USER> ALT 89
  • USER> ENG
  • USER> ZERO AZ TAR
  • USER> ZERO ALT TAR

Drive AZ and ALT slowly in +ve direction over the zeroset target points, then switch to computer control again
To zeroset absolute:
  • USER> ZERO AZ ABS
  • USER> ZERO ALT ABS

Zeroset absolute will go wrong in case an absolute encoder bulb is broken! When slewing to the first object check azimuth and altitude incremental and absolute encoders are in close agreement and updating. Zeroset the prime focus rotator using:
  • USER> ZERO ROT ABS

Then load the correct pointing model, set the telescope focus and move the nasmyth flat to the stow position:
  • USER> CAL LAST
  • USER> FOCUS 85.90 (27/09/13)
Autoguider

The light to the autoguider is fed by a fiber, giving a FOV (25"x25"). Use in twilight to define the AG window.

  • Use the standard uDAS autoguider from whtdas18 with 'obssys 1', 'startobssys' and 'startag AG2' followed by 'option 3'.
  • DS9 display tool will also appear as well as the TV Guider Control. This box allows you to change exposure times, take fields and set the TV and guider going. Images are piped directly to the display tool.
  • GSS2 is used for finding guide stars. On OSADISPLAY2 open GSS2 using the icon on the desktop, select WHTPrime and include any offsets applied.

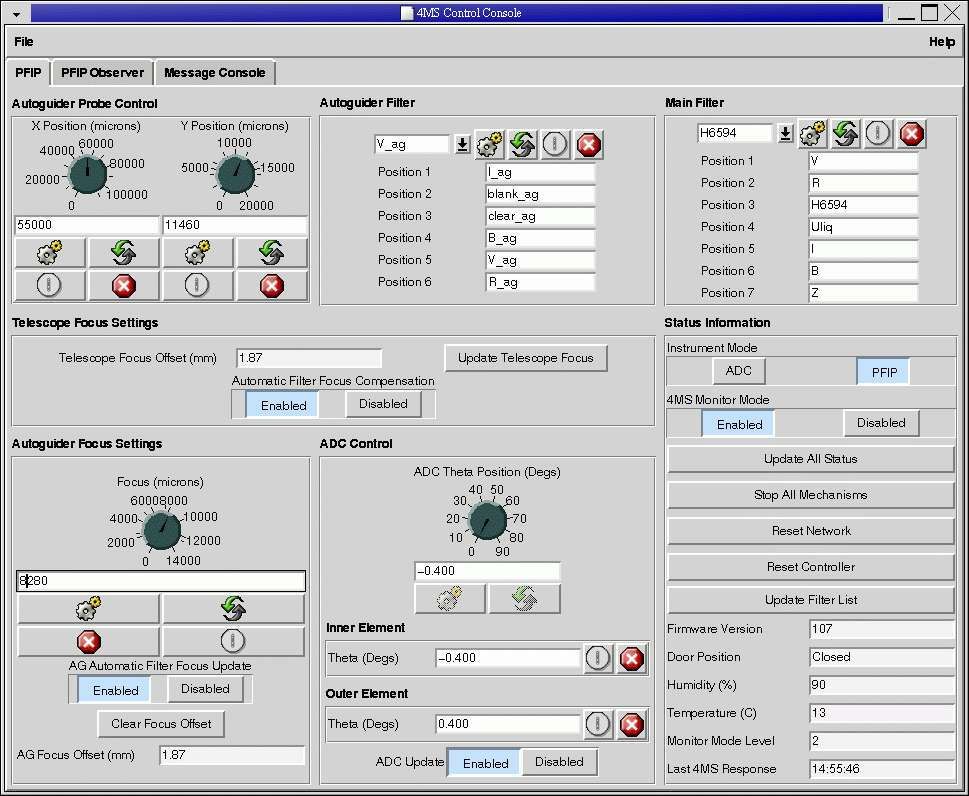
From the observer interface the autoguider probe can be moved, the control GUI starts using the command from the SYS or TO prompt. The obssys brings up one such GUI on WHTICSDISPLAY but the TO can bring up another one on the taurus session. It is useful for controlling Autoguider probes and focus. The probe response is faster on this GUI than when using the command line. To move from the command line use:

  • agprobe "X probe position" "Y probe position"
  • where x range = 1-110000 and y range = 1-20000 microns

SYS> 4MSControl.


The main use for this GUI is to change the filter in the science camera. Click on the tab "PFIP Observer" (opens by default) and underneath the button "Update filter list" there is a menu-bar with which you choose the filter. Next press the button with the wheel to actuate the move to the selected filter. A PDF document giving a complete list and description of the PFIP mechanism commands and PFIP controller solaris software (PFIP GUI included) can be found here or through this link to the Instrument Page User Guide.

Orientations

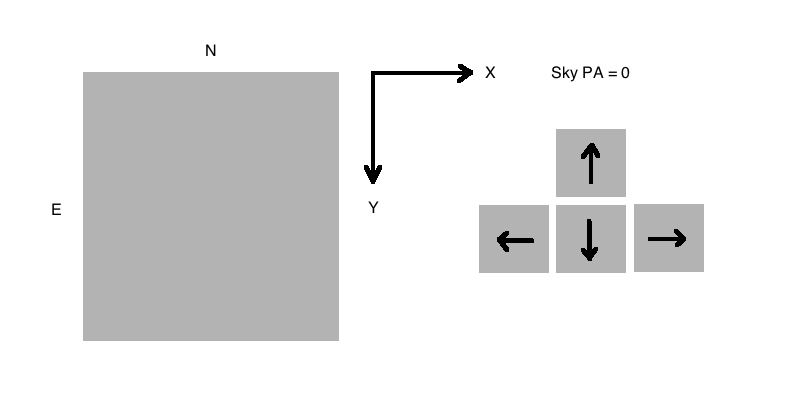
Science Camera

The diagram below shows the direction in which the star moves on the science detector for a given X or Y telescope movement. Rotator centre is at aproximately 2074 2072.

AUTOGUIDER

  • PGDY----> width 1500 units =25"
  • PGDX----> width 1500 units =25"
Preparation

Filling the cryostat:

The cryostat is at prime focus so it is necesary to park the telescope at AP2.

From the TCS:

  • USER>DOME 298

This is important to prevent water dripping from the edges of the shutter onto the camera electronics in wet conditions.
  • USER>ROT MOUNT 55 (FILLER TUBE AT TOP)
  • USER>AZ 298, EL:15

When the telescope has stopped change to ENGINEERING mode and go up to the telescope and move it manually to AP2. After filling the cryostat move the telescope out of access park by pressing ZP. Go back to the control room and switch back to COMPUTING mode.

Rotator centre and Calibrate procedure:

Without any aperture offset, the rotator center is very close to the centre of the CCD.

  • USER> cal faint, then ^Z (go to the next faint calibrate star)
  • USER> rot sky 0
When in position take a short exposure and measure x and y within the defined window
  • USER> rot sky 180
When in position take a short exposure and measure x and y, then calculate the rotator center. This should be close to the center of the CCD.
  • USER> cal faint
Take short exposures for all 7 stars, calculate offsets (in RaDec) with respect to the rotator center and input these in HANDSET mode.

Observing

Acquisition:

PFIP usually observes with a Rot Sky 0, 
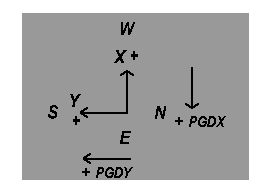
so it is important to be sure that the rotator doesn`t reach the limit switch.
The MOUNT PA range is only 357 degree total, (limits: -163.37,193.63) hitting the limit you can't simply unwrap, you have to wait a certain time until you got past the 3 'forbidden' degrees, this may take a while, depending were the object is on the sky; therefore watch carefully what the limits are, each time you move to a new source!

Guiding:

Open a terminal, logon as whtobs and type 'obssys' followed by the correct option. From this TO-window the probe is moved with command 'agprobe' and the guider focus with 'agfocus'. Focus was around 10200 (27/09/13). 'pfip_status' lists the status.

GSS search results require little or no correction, even when an APERTURE OFFSET is included. GSS was 100% correct at ROT SKY 0 including apertures. Other angles than ROT SKY 0 have not been tested, but there is a good chance that GSS will also work there.

Dithering while keeping the guide star:

The observer will usually use the OFFSET ARC command to make a dither pattern. Even a dither of 10 arcsec will require adjusting the guide probe position because the star image is so large compared with the Guider field (unless you are clever enough to place the star in the correct corner and make a 4-point square dither pattern). Basically for every 10 arcsec offset, you need to move the probe 600 units. A telescope offset in +X will require a probe offset in +X, but a Y offset requires the probe to be offset in the opposite Y direction to recapture the star.

Data Handling

The data may not all fit on one 4.7 GB DVD. Even 4.5 BG on disk will not write to 1 DVD.


Top | Back

Contact:  (Observing Support Assistants)
Last modified: 31 October 2013