The following is a basic check procedure for
NAOMI, to be used by the Duty Engineer as routine afternoon checks, during
a run period after the first night of observation.
For pre-run checks, between runs or on the first day of a run, or
in case of trouble, for example if the image quality has degraded and the
DM needs proper flattening, please refer to the detailed NAOMI
readiness check-list.
List of abreviations (or names)
-
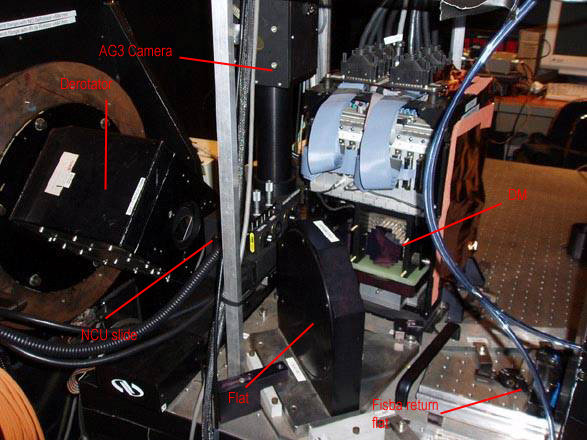
DM:
Deformable Mirror
-
SG:
Strain Gauge (for the control of the DM segments)
-
FSM:
Fast Steering Mirror
-
NCU:
Nasmyth Calibration Unit (slide with pinholes, calibration lamps and AG3
camera)
-
OAP2:
Off-Axis Paraboloid number 2
-
OAP1:
Off-Axis Paraboloid number 1, it’s in fact the FSM
-
WFS:
Wave Front Sensor
-
OMC:
Opto Mechanical Chassis (associated mostly to the WFS)
-
USP:
Universal Science Port, to which OASIS is attached. By extension, mechanisms
on the optical bench
-
FISBA:
brand of the interferometer used for mirror flattening
qSummary
of basic daytime checks
Environment
-
Temperature and Humidity are seen
from the display either below the Met display in the Control Room or
in Grace Electronic Room. Humidity should be maintained above 30% (too
low it makes the piezo-electric SG unstable). Steep gradients in T or
%RH are especially bad for DM stability.
-
Check in Grace if the de-humidifier
tank needs to be emptied
-
Depending on conditions start-up
the humidifier (only a few hours autonomy with full tank)
Inspection of the light path
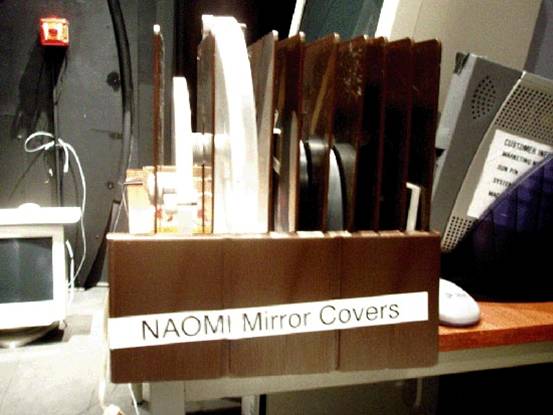
Where to store the mirror covers
Electronics
AODISPLAY is a pc which allows to emulate a unix session (via Exceed)
either to Navis or lpss42. The left screen is an 8-bit display and reserved
for topgui; the right screen is a 24 bit display and allows to launch more
complex (and modern) mimics or gui's. If the AO system has been in use
on the previous night, it shouldn't be necessary to log on (as naomi)
again.
From AODISPLAY right screen:
-
telnet to Taurus for a session as whtobs
then type obssys, answer
1, 1 (but don't start the observing system!)
-
Run the oasisgui: startoasisgui ; if everything
is in error it’s probably a server problem, which shouldn’t happen if
the observing system has started properly on Taurus.
The command startoasisserver will give an error if the
server is already running.
-
From oasisgui USP page float the
bench (it takes 5min to stabilise); move the NCU to simplex position.
Disregard the ADC error status (ADC is not commissioned
)
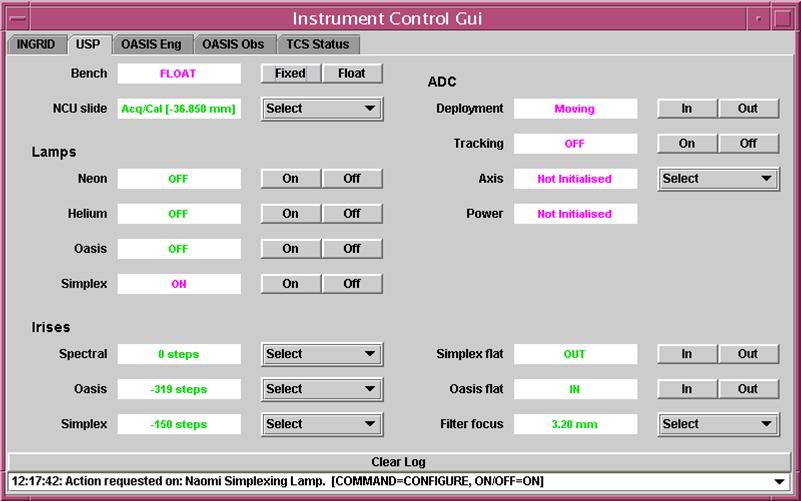
oasisgui USP page
- If Ingrid or OASIS is going to be used
try moving mechanisms from Ingrid, OASIS pages. Some
(enlarger or imager wheels on OASIS) might require more than one attempt.
In case of persisting problem contact an AO specialist or a Software specialist.
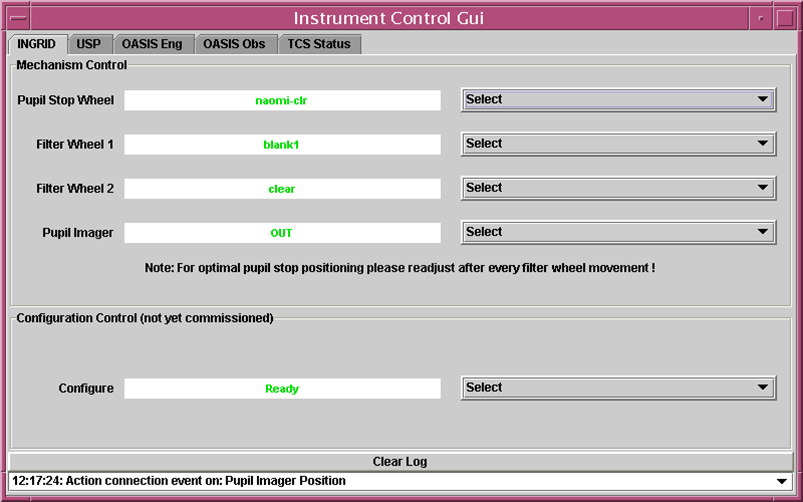
oasisgui INGRID page
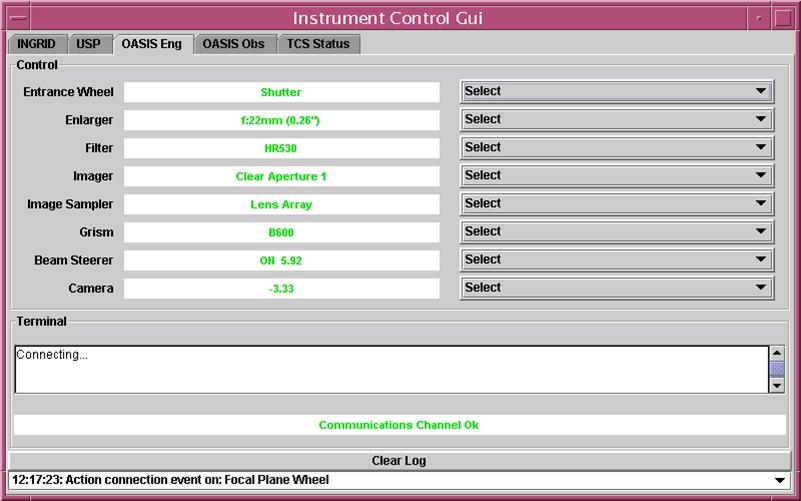
oasisgui OASIS Engineering page
From AODISPLAY left screen:
-
If TopGui has not been left running, type restart
or NaomiRestart then topgui & .
-
The left half of Topgui is static, the right page gives access to SDSU control, C40, Mirror
Control, Light Path, etc either from the
icons or from the Tools menu
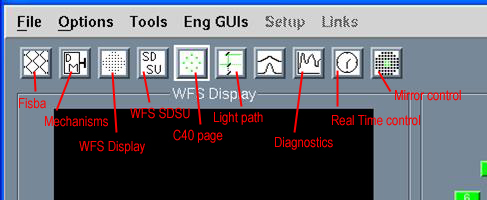
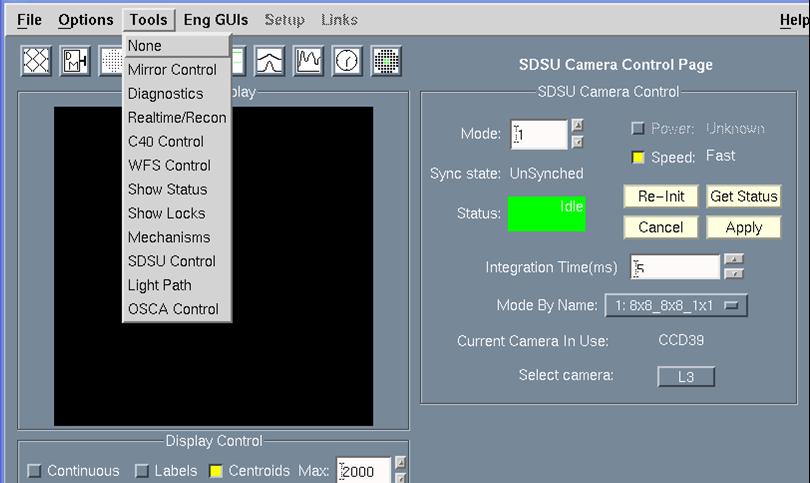
TopGui icons and Tools menu
- From the C40 page check if all 16 processors are in green. Left ring
is for WFS, right for Strain Gauges (ie DM control). The SG icon is pink
which means the loop is open, that’s normal. NaomiRestart usually
clears most processor problems, otherwise call an AO specialist.
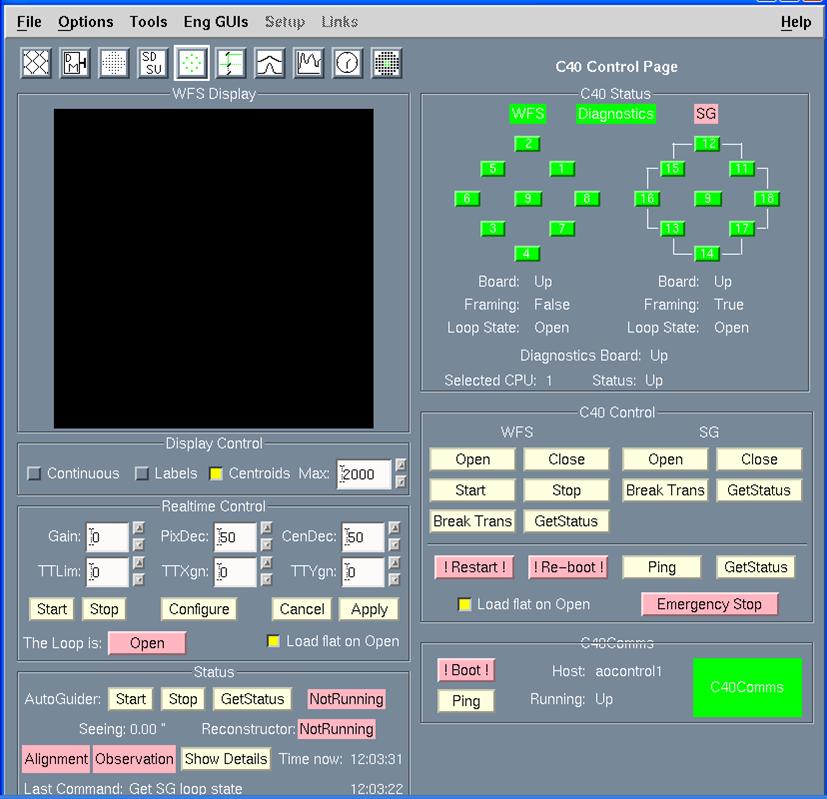
- In C40 Control under WFS click on Start to get WFS into
framing mode and in the Display Control click on Continuous
- Check noise level on the WFS, either
visually (with Max level in the Display
Control set at 100,
no diamond structure is visible on the
image) or more precisely from the WFS Display page, with a Grab, Save as Fits and then display
of the file on
iraf, using imexam. An rms value of 7 to
10 is normal.
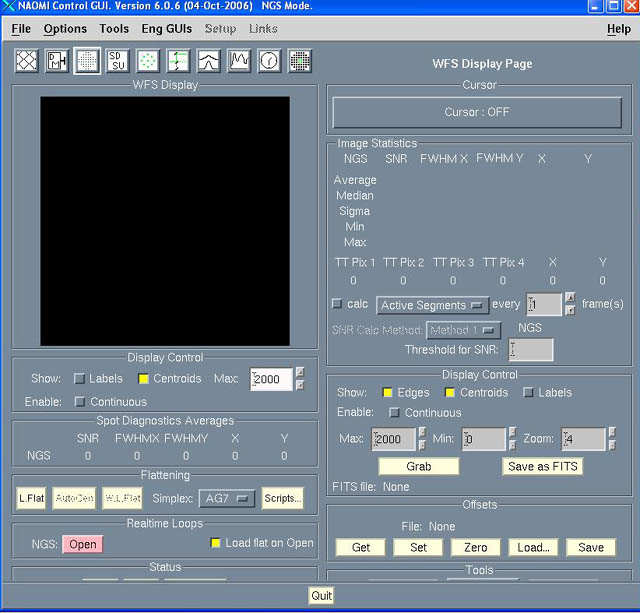
WFS Display page, from which to Grab
an image of the WFS
- Sanity check for the WFS SDSU: try changing
to Mode 10 (while the WFS is framing, but not in continuous display
because this would give a Timeout error) then
switch back to Mode 1. If Status turns to Error, power cycle the
SDSU power supply and VME crate in GRACE (centre electronic rack, bottom).
- After an SDSU power cycle or if it gives
repeated Timout errors the WFS needs a Re-Init from TopGui
WFS control (SDSU) page.
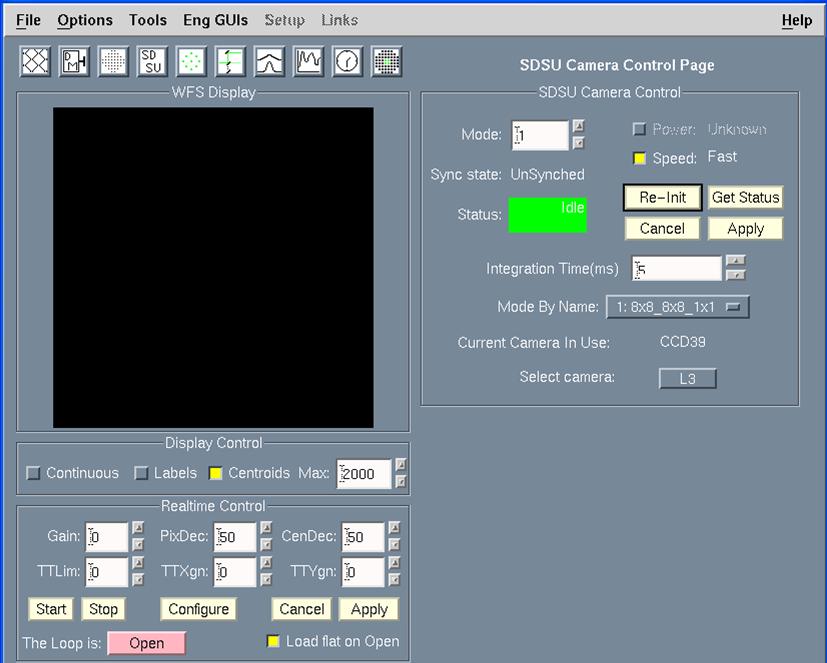
SDSU Camera Control page, from which to Re-Init
the WFS SDSU
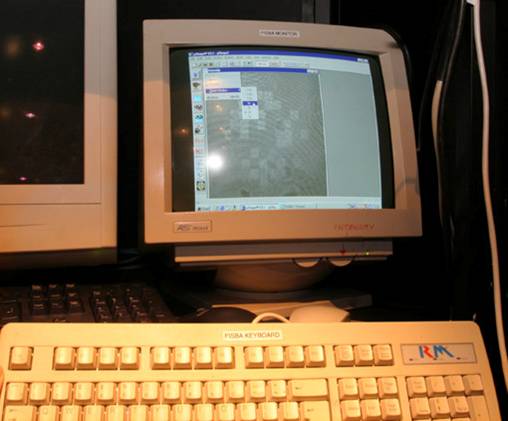
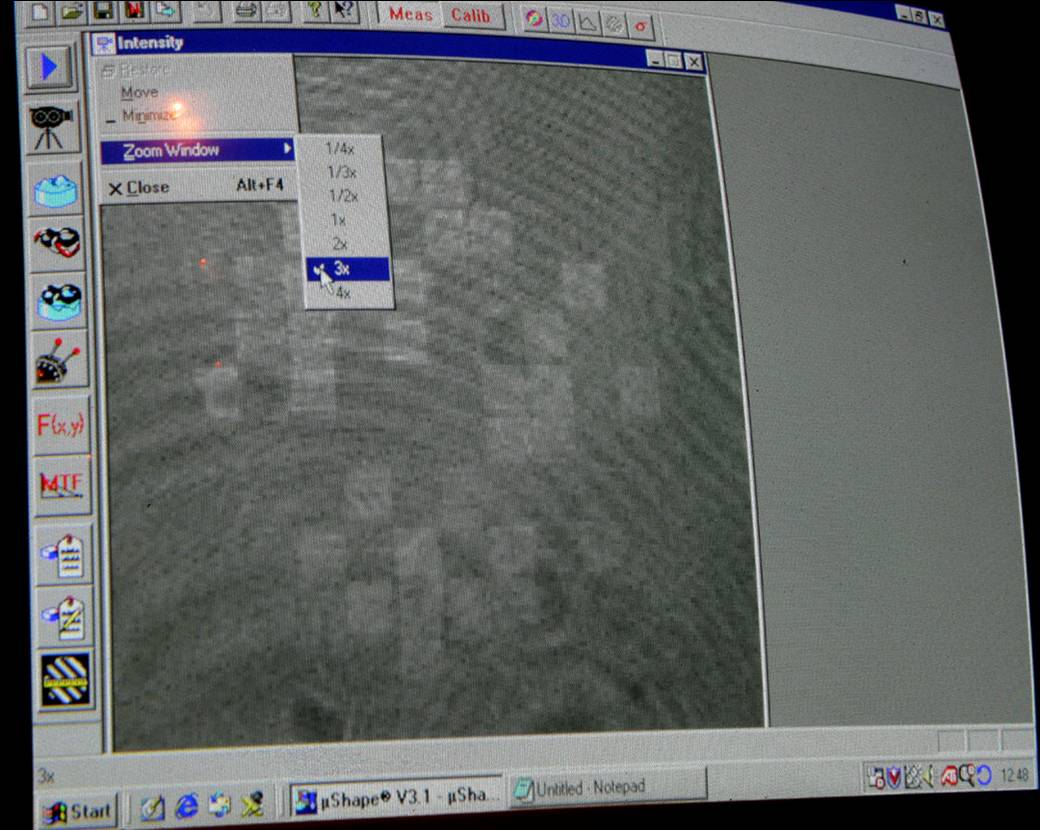
Switch on the Fisba Monitor, on channel A
Back on AODISPLAY
- From the Light Path page load
the latest DM flat (usually from last night). On the Fisba
monitor with the interferogram, the DM segments
will still show lots of fringes.
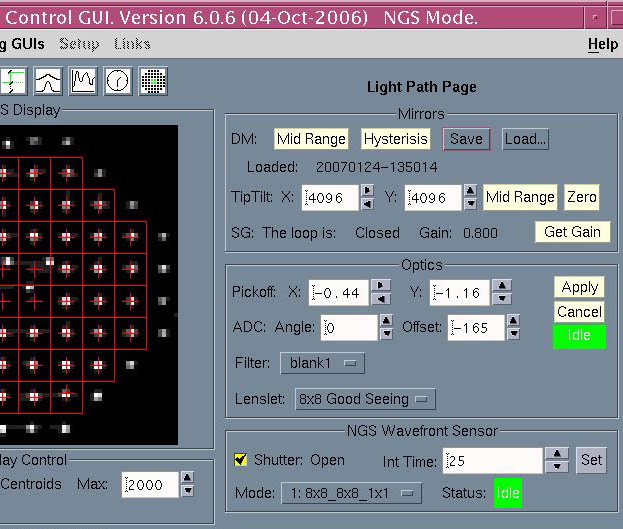
TopGui Light Path page
- From the C40 page close the SG loop. If
temperature and humidity conditions have not changed dramatically since
the end of the night, the flat should still be good enough (on the Fisba
display all segments visible and uniformly lit, no fringes or
only a couple of fringes visible). If not, a
laser (Fisba) flat is needed, see complete checks procedure.
- From oasisgui
USP page switch on the simplex light, Iris at -150.
-
From TopGui Light Path page open
(if not already ticked) the WFS Shutter.
-
Send the pick-off probe to 0,0. Spots should be visible
on the WFS Display. Centre approximately
the spots on the DM grid (a segment is 2arcsec wide) by entering
values in the Pickoff X and Y boxes and clicking
Apply,
then click on Autocentre from
the General Scripts gui
to recentre precisely.
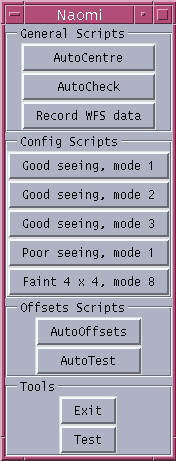
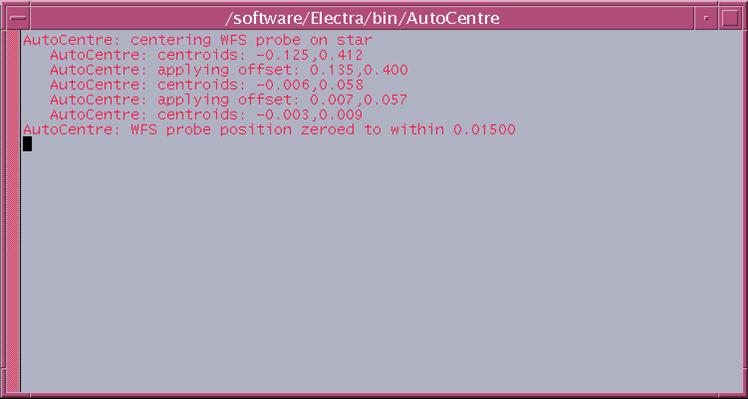
General Scripts gui, for AutoCentre,
and result of the AutoCentre. To close that pop-up window, just locate
the mouse cursor in it and press Enter
- If the pick-off probe doesn't move
(and status turns to Error) you will need to initialise it:
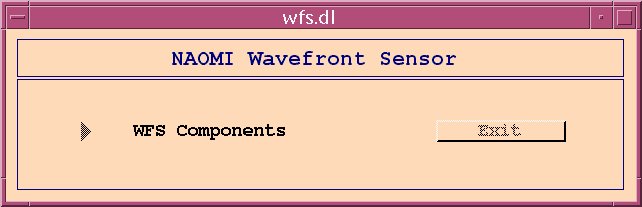
from TopGui’s EngGuis – Mechanisms DM bring up 3 cascaded windows: NAOMI Mechanism control
mechs.dl, right-click on NAOMI systems to start Wavefront
Sensor wfs.dl, right-click on WFS Components
to start Pickoff Mechanisms pickoff.dl.
Click Init, Start, wait for the Idle status, and click Index,
Start. It takes a few minutes to initialise, and this will leave
the pick-off probe at (X,Y) = (5.32,3.31). From TopGui send it back to
0, 0.
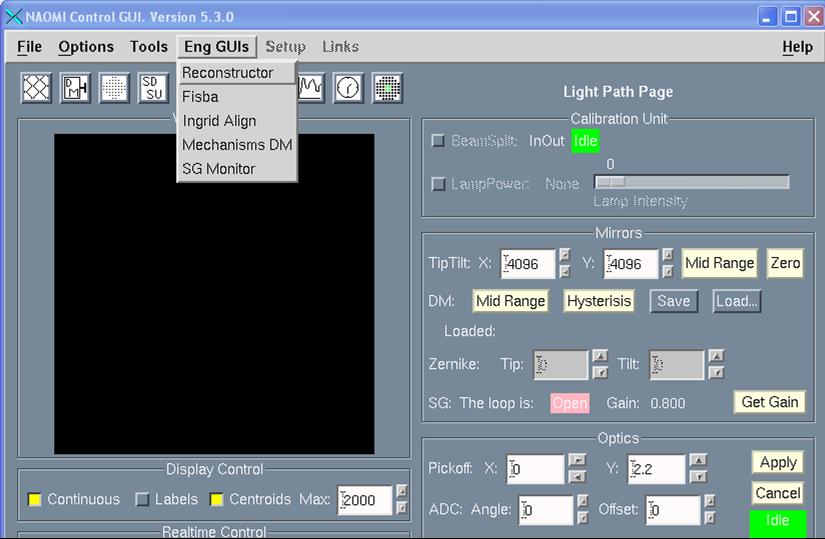

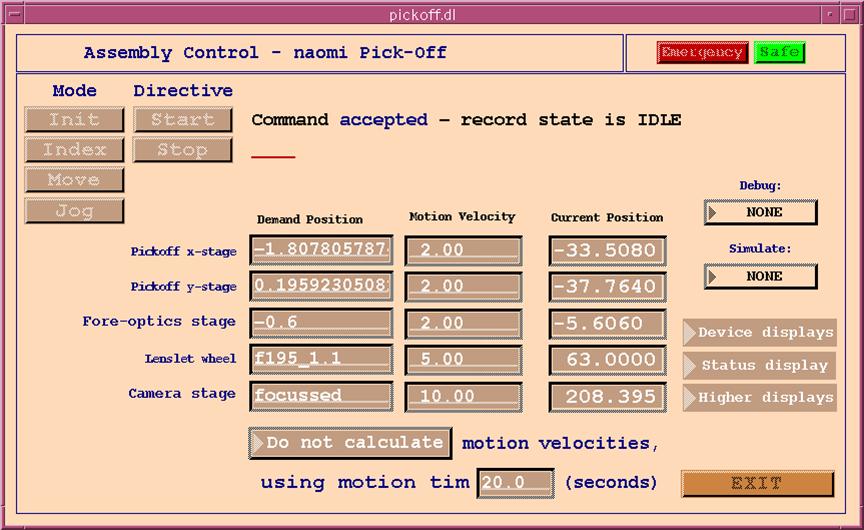
How to intialise the Pickoff and
related mechanisms from the engineering gui's
Checking the image quality on the Simplex Camera
AG7
- From oasisgui USP page move OASIS and Simplex
flats to be IN the beam. Edit the value
of Filter focus, set to 3.0mm. With the Simplex light ON, set the iris
to -250.
- From Taurus ICS window take an image:
run 0.1 AG7
-
Display the .fits file
with Iraf, use imexam j and k commands,
or r for the radial profile. At this stage if
the image looks good enough, fwhm of
the order of 3 pixels, no further flattening of the DM is needed. Otherwise
refer to the complete procedure for mirror flattening.
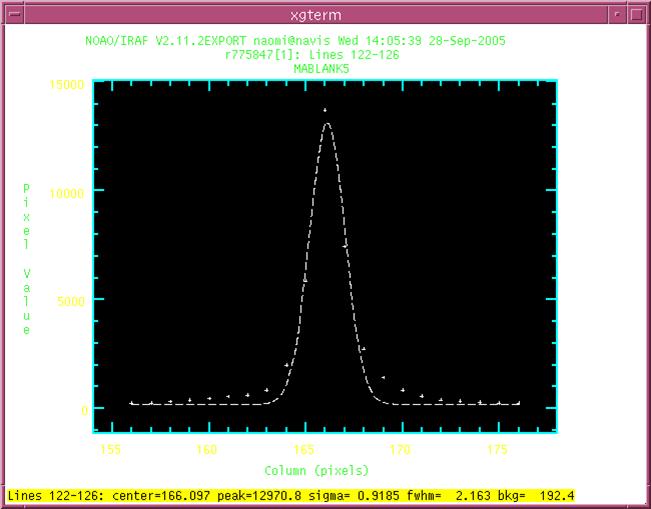
Example of a good image profile
Checking light reaches OASIS (only if it will be used
on the following night)
-
From oasisgui USP page fix the
bench (it takes a few minutes for the air to flow away). Simplex light
ON, set the iris to -150, use 50/50 dichroic. Then take the Simplex flat
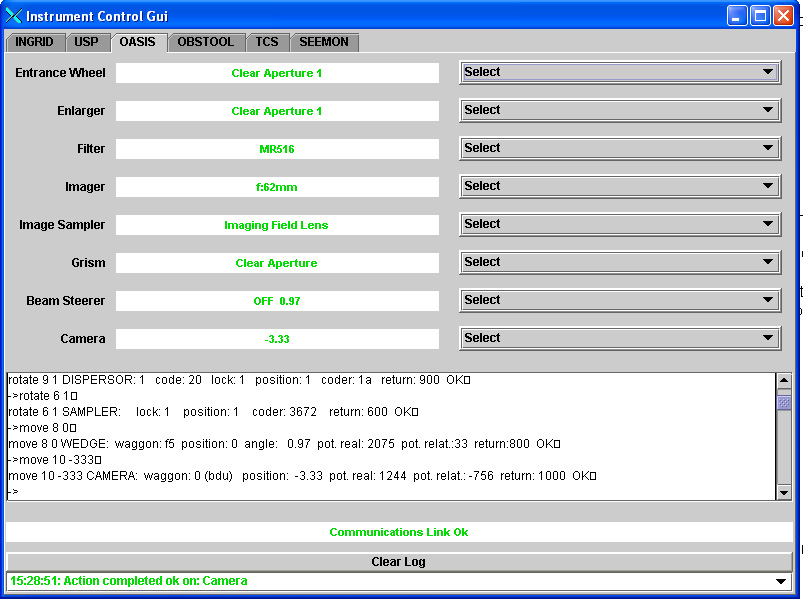
OUT, OASIS flat IN; Filter focus to imaging.
- From oasisgui OBSTOOL page, in
Set Demand select Observing mode Imaging, with any filter
as Spectral config, for example MR516. Then
in Configure tick Oasis and click on Configure Selected Items.
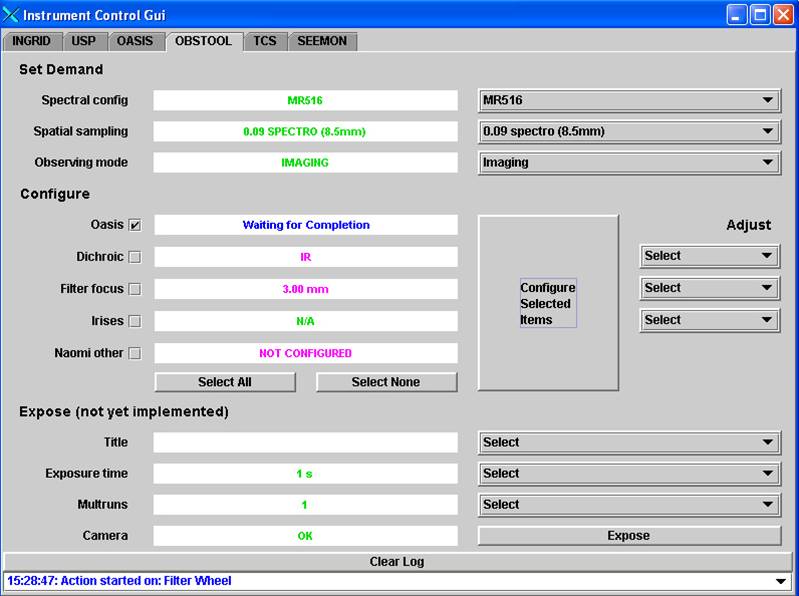
- The instrument mechanisms can also
be configured one by one from OASIS (Eng)
page, it only takes longer and there's a risk of forgetting something. You should check though that you end up with
something like this:
-
From Taurus set the standard
CCD window: window oasis 1 “[1:2059, 1035:3140]” then take an
image: glance oasis 1 and display the file s1.fit with iraf,
the spot should be visible.
Checking light reaches INGRID (only if it will be used
on the following night)
-
From oasisgui USP page fix the
bench, move OASIS flat OUT of the beam. Use IR dichroic. Simplex light
ON, Iris to -150.
-
From oasisgui INGRID page, configure
Ingrid, for example choose Simplex
H and take the pupil imager OUT.
-
From Taurus take an image: glance
ingrid 1 and display s1.fit with iraf (use ingridql package instead
of the basic ing package and display with the idisp command),
the spot should be visible.
At this point, the basic daily checks can be considered as done.
It's not generally required to the DE to flatten the mirror (DM), unless
its figure is really bad. In this case see the Laser Flattening process,
in the complete Naomi
Readiness Checks.
You can also refer to the Naomi Setup and
Observing Recipes page, which is more oriented towards AO support astronomers,
and is maintained by Chris Benn.
Link to Naomi Engineering
page
Link to Naomi
Astronomy page
Back to top of page