


Previous: Generating relative astrometry from LDSS-2 images
Up: Preparation of mask data
Previous Page: Generating relative astrometry from LDSS-2 images
Next Page: How to get the masks made
Once you have created an astrometric catalogue file,
LEXT provides facilities to design and optimize the slit positions and
sizes for the actual mask.
The main stages here are:
- Set the lext parameters which describe the dispersion and
wavelength range relevant for the grism that you intend to use.
- Display where the direct images of the targets will fall on the
detector surface to identify obvious overlaps
- Edit the MASK list (graphically) to remove supernumary targets
- Display where the spectra will be on the detector to identify remaining
overlaps
- Edit the MASK list again to fine-tune the slit parameters
- Optimize the slits to maximize the slit length for each object
- Display once more to verify the optimized slit parameters and,
if necessary, edit again to fine-tune the parameters of individual
slits
Finally, you will need to output a file containing the manufacturing
instructions as described in the next section.
This can all be done with standard LEXT functions but it will probably
be easier to use the LEXT procedures SET_GRISM, PREDICT_SPECTRA,
EDIT_MASK, OPTIMIZE_MASK and DRAW_MASK as described below.
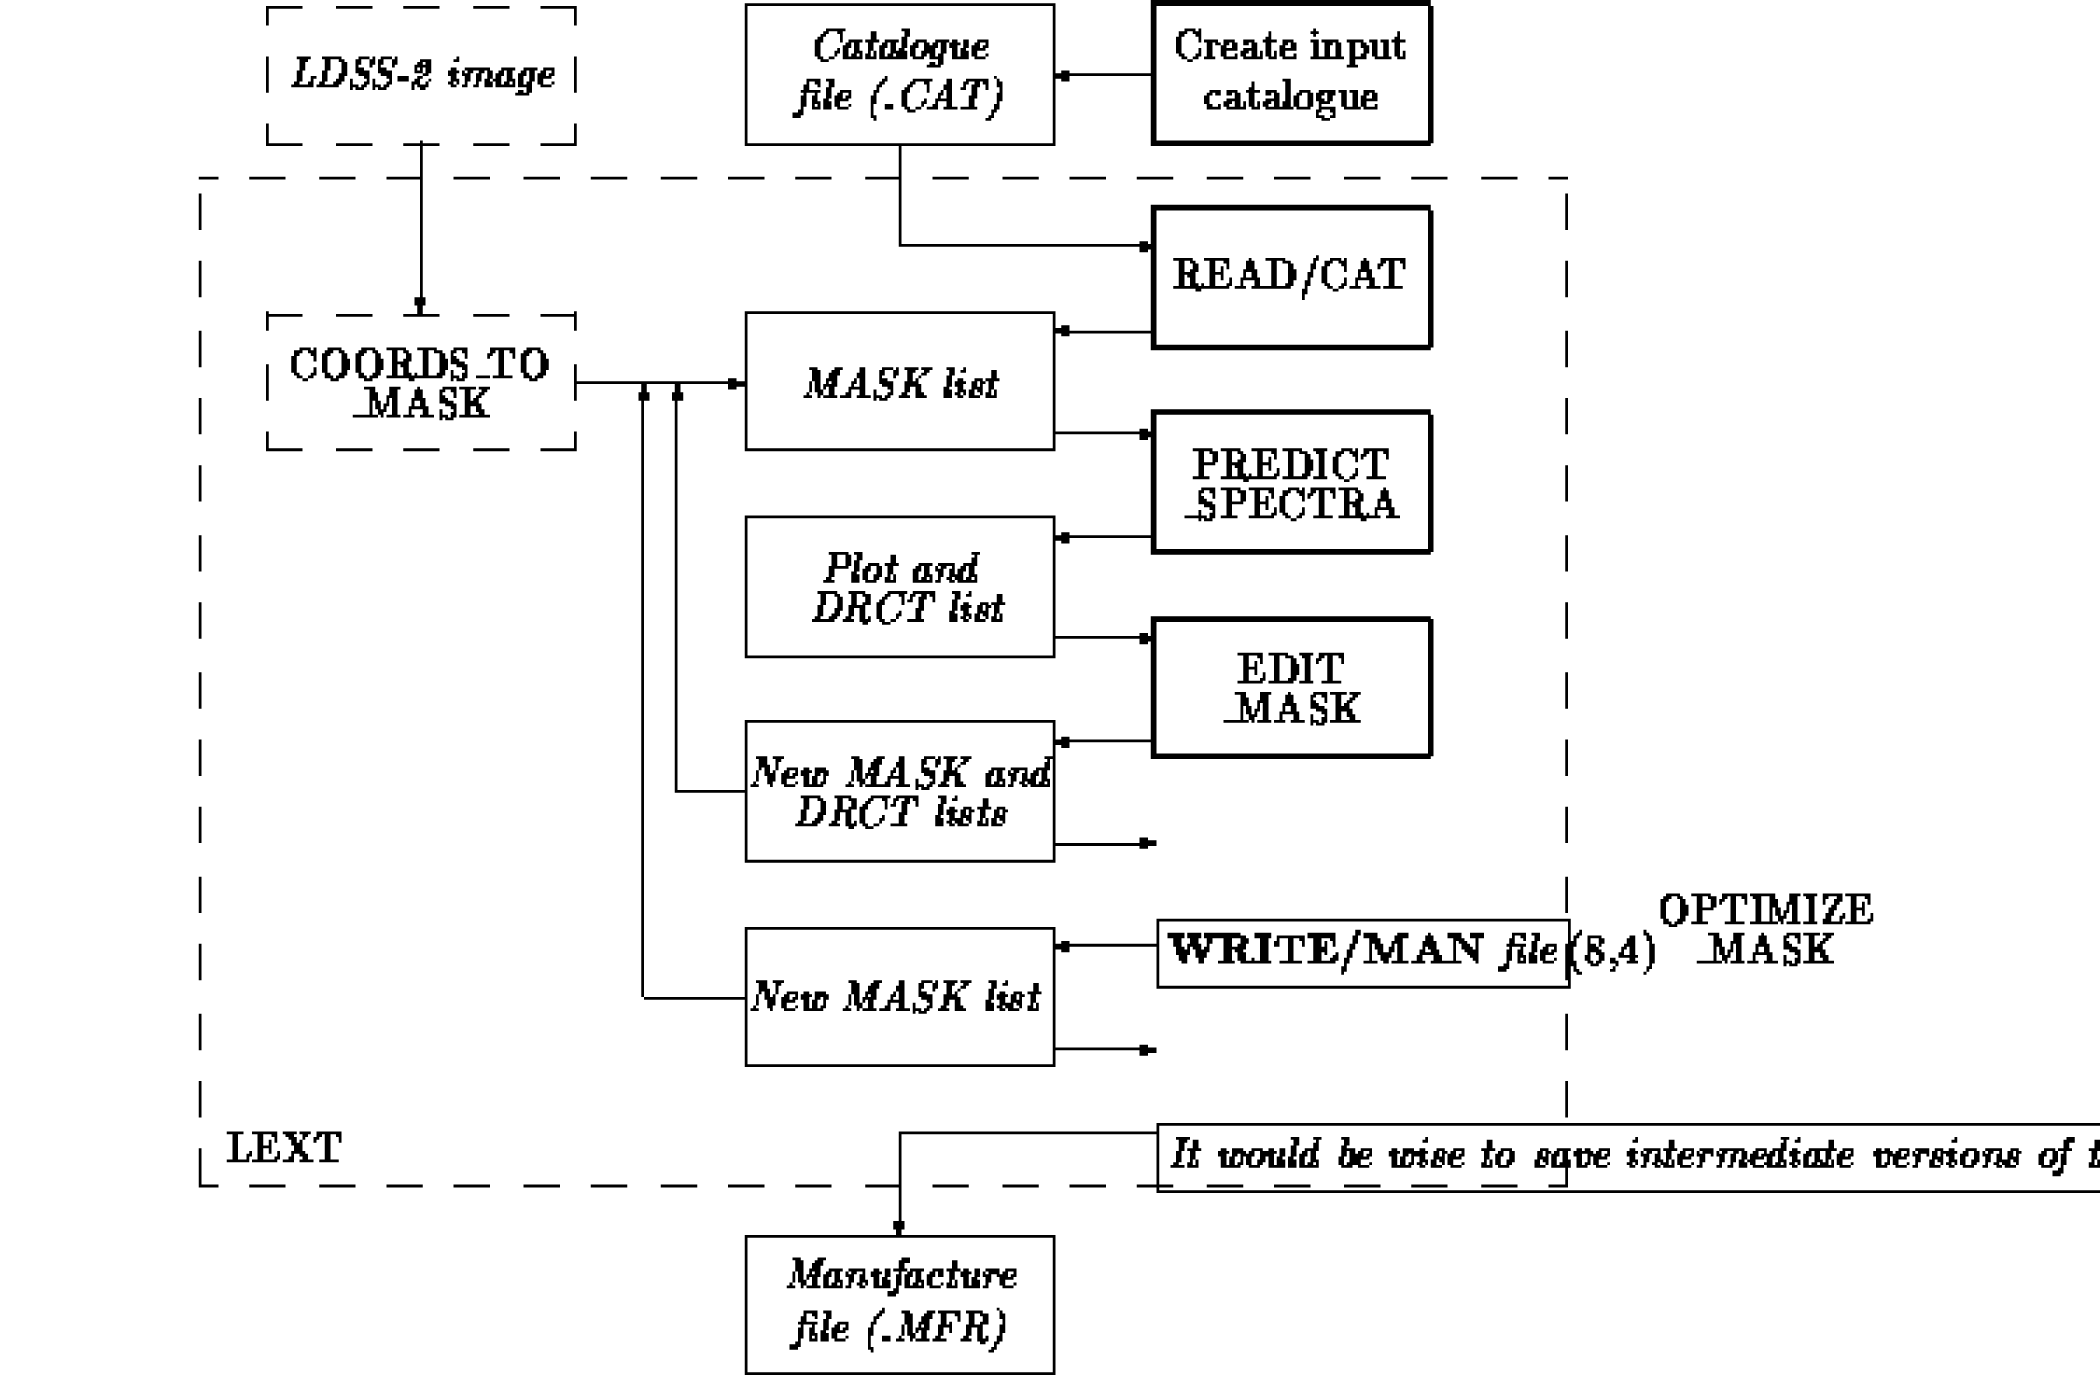
- SET_GRISM. This simply reads a .SET file corresponding to
the relevant grism.
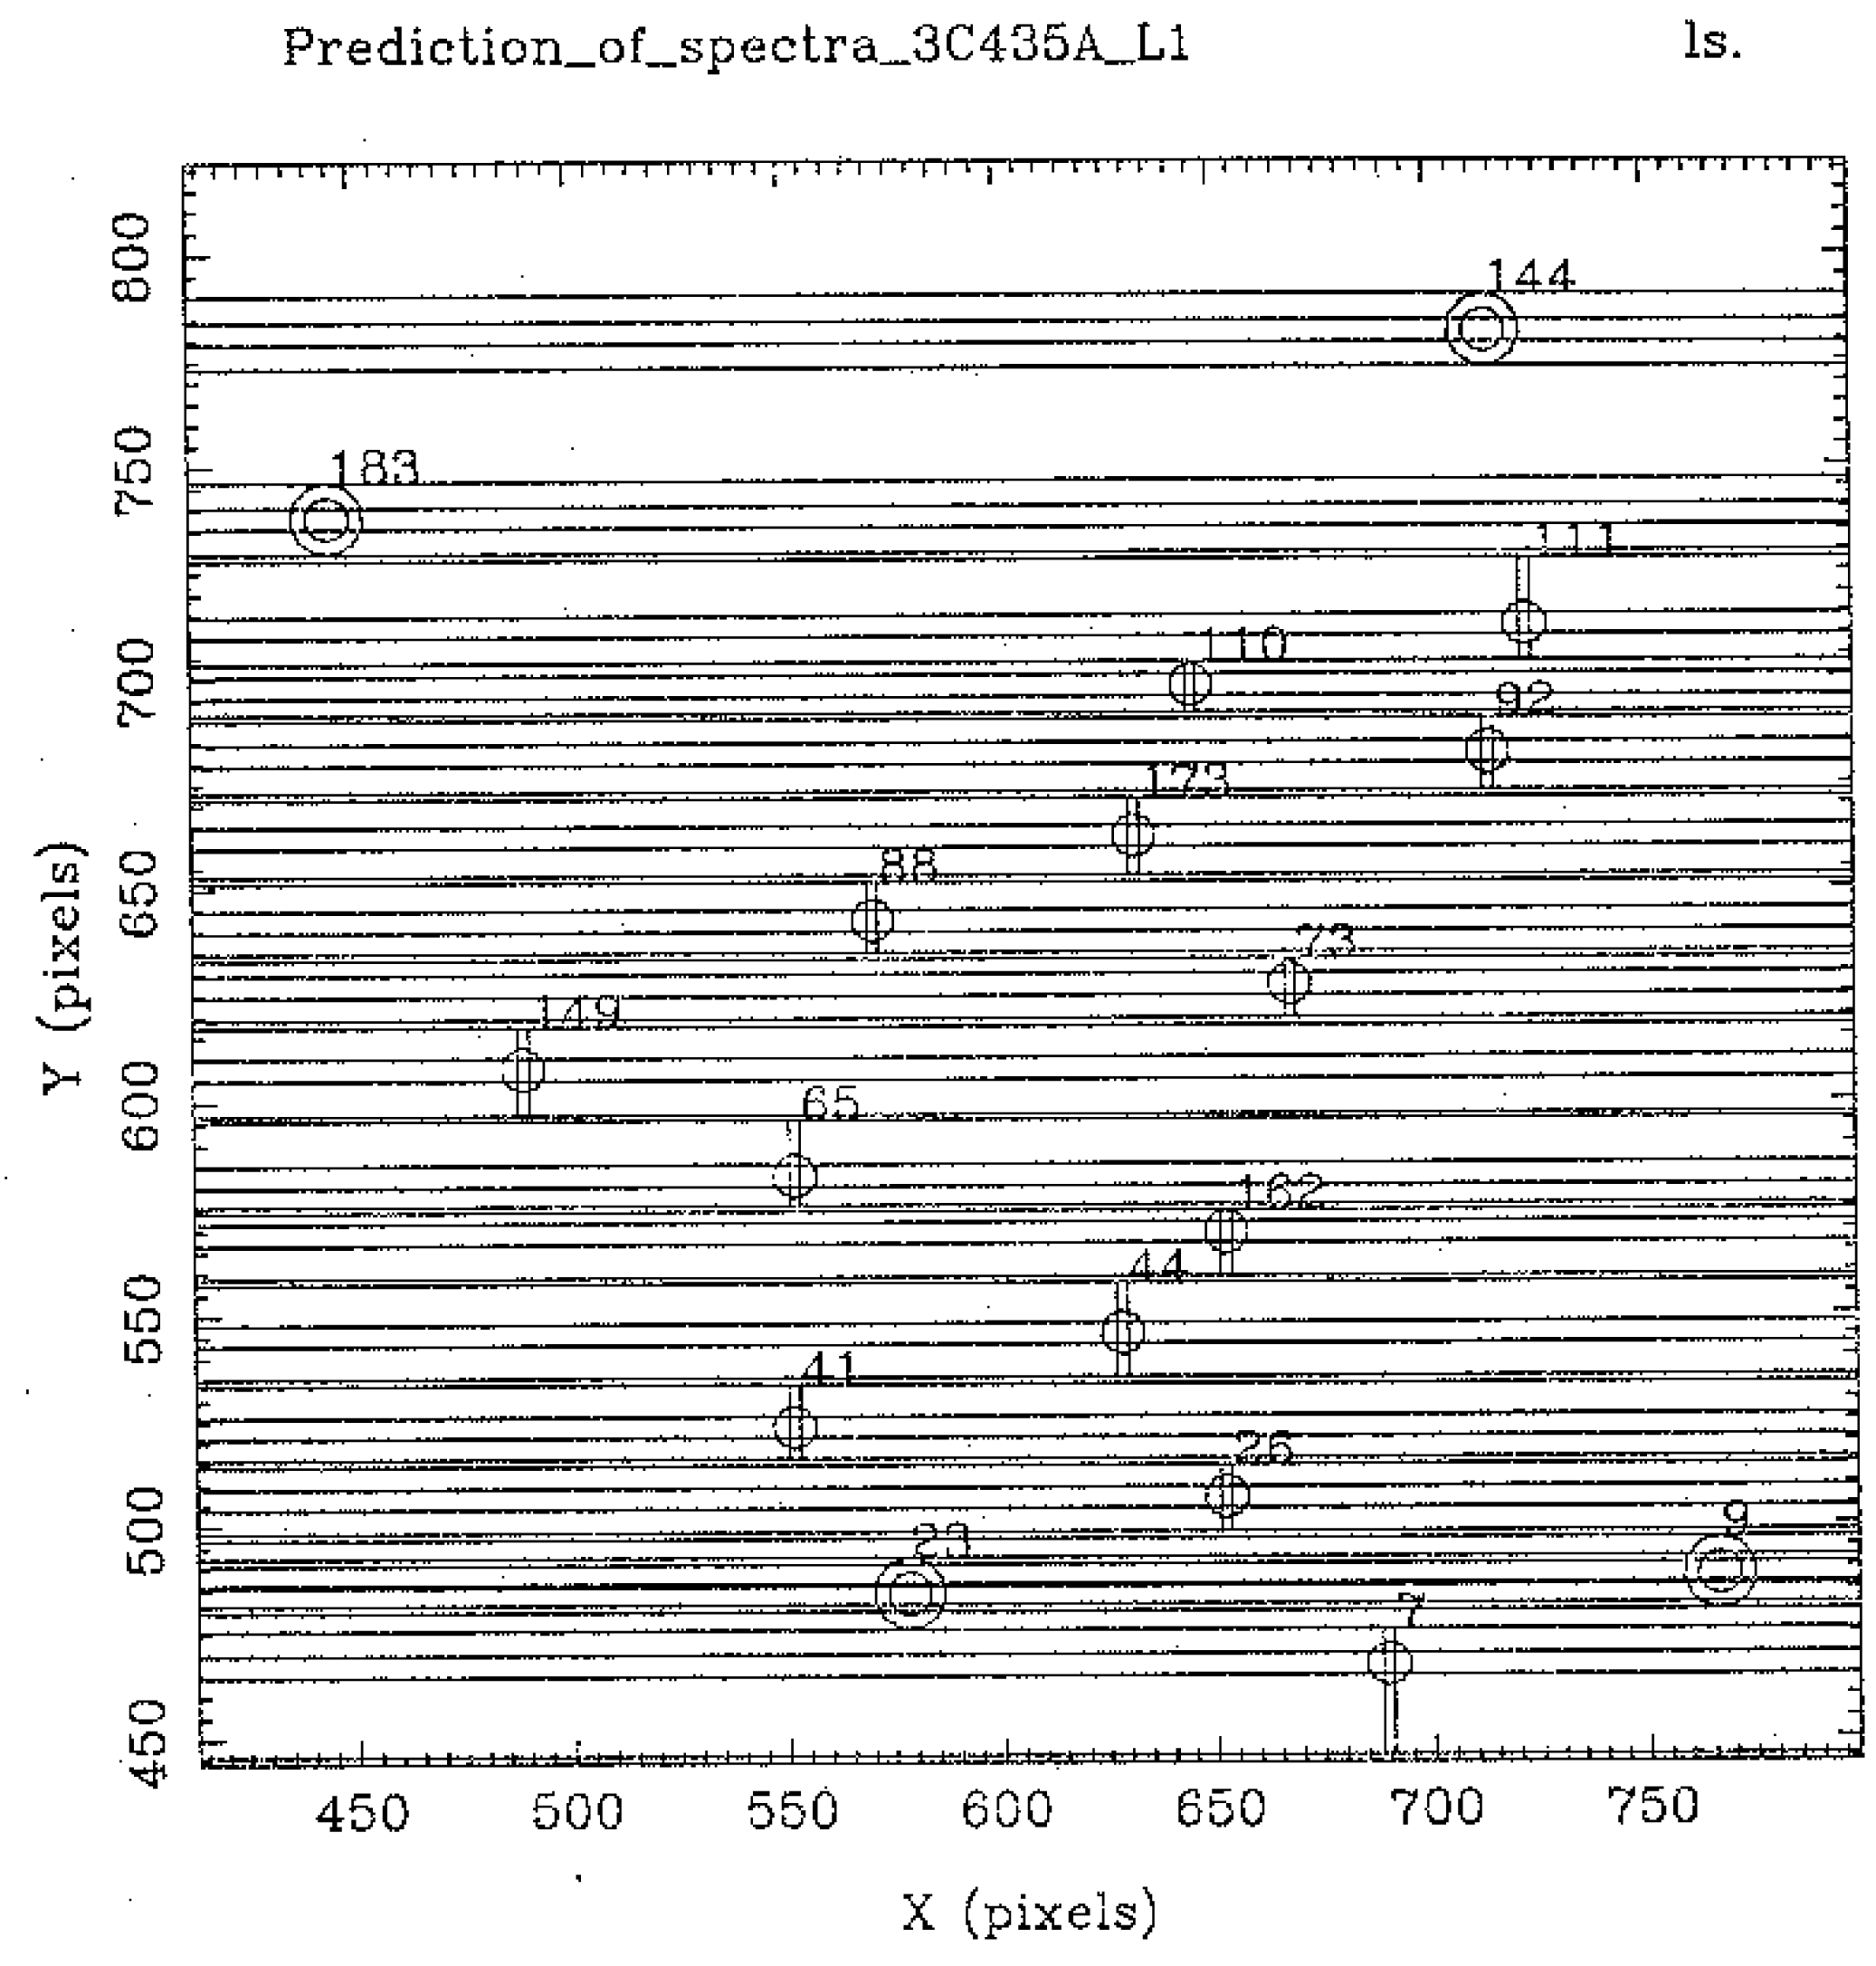
- PREDICT_SPECTRA.
This plots the predicted position of the direct images of the targets
and the position of the currently defined slits as they would appear
on the detector.
Each target is shown as an open circle with the current slit assigned
to it superimposed.
The fiducial stars are shown as open circles within larger circles
which indicate the size of the fiducial hole.
Each target is labelled with the ID number from the catalogue file.
Optionally, the location of the spectra will also be shown but this
can be confusing if you have a lot of supernumary targets at this
stage.
The user can decide whether to display the whole detector surface or
just the area in which the targets are located.
The input is either a user-specified catalogue file (see
Section 2.2.1) which will be read into a MASK list or an
existing MASK list (which may have been modified already).
Fig 5 shows an example of the output.
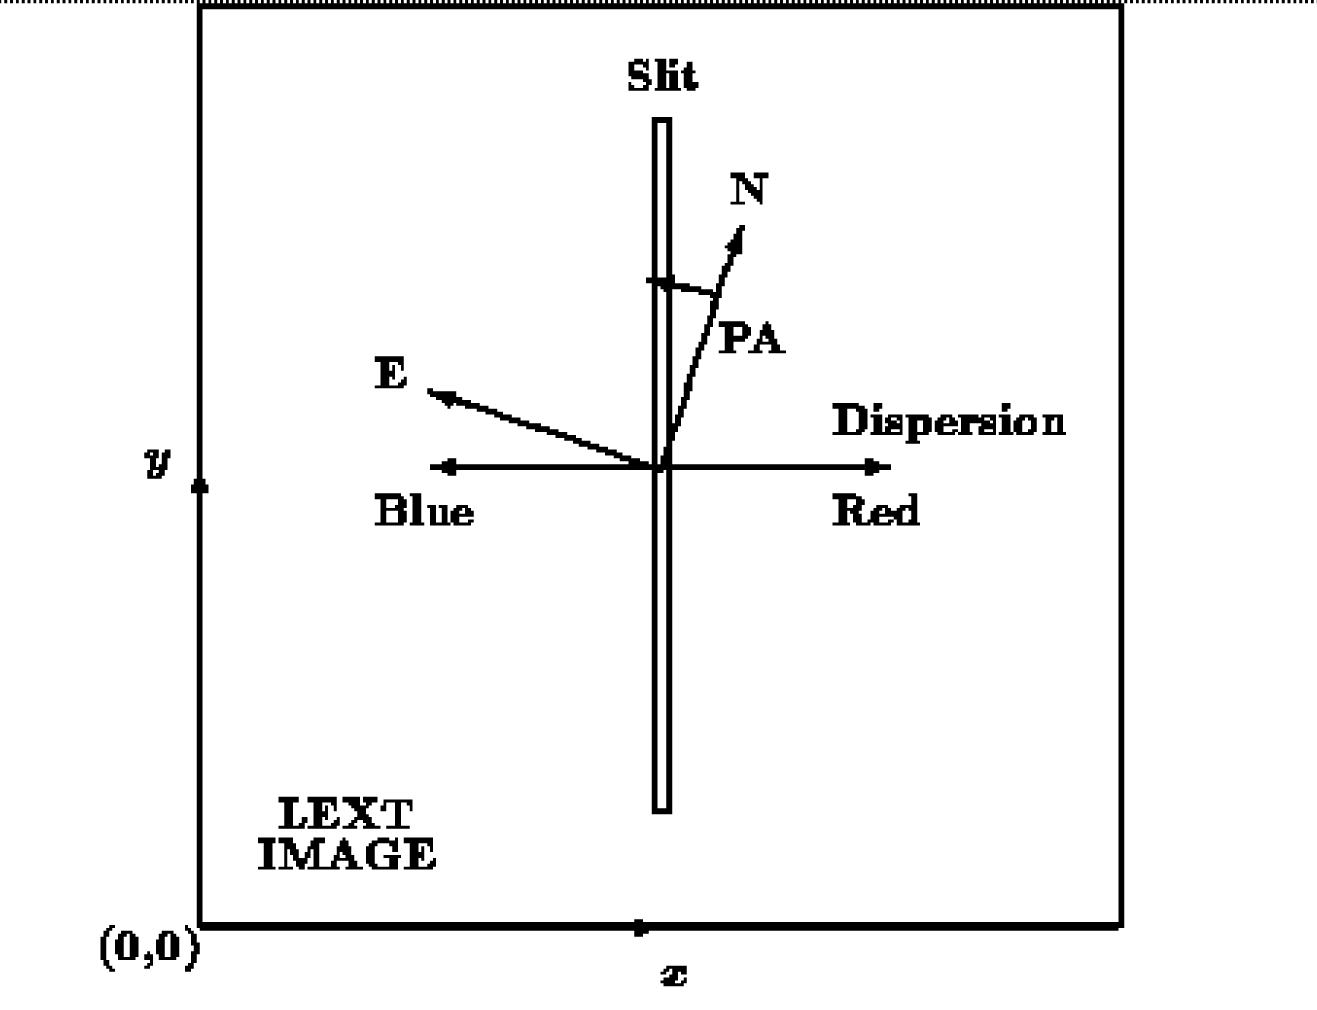
The coordinate system used by LEXT is shown in Fig 6.
The procedure also produces a new list of type DRCT, which, together
with the MASK list is updated by the EDIT_MASK procedure.

- EDIT_MASK. This uses the plot created by the procedure
PREDICT_SPECTRA to graphically edit the MASK list by pointing
to the appropriate direct image of the target with the cursor and
deleting or editing it by pressing the appropriate number on the
keyboard.
If the target is deleted (press 1), it is removed from the plot (the
label will remain).
If the target is to be edited (press 2), the user is prompted for the
parameters describing the current slit. These are:
- Displacement of slit in Y (pixels): A positive value here will move the
whole slit upwards
- Length of slit (pixels): Set the value you require
- X position of object (pixels): you should not normally change this
- Y position of object (pixels): you should not normally change this
- Y extent of object (pixels): changing this may affect how the slit is
subsequently optimized
In each case, the current value is offered as a default.
The initial values of the global slit parameters are set internally
(see below).
After this, the display is updated to indicate the alterations.
You can edit as many targets and their slits as you like, finishing by
hitting key 4 while the cursor is within the display area.
This procedure updates both the MASK and DRCT lists so that a subsequent
PREDICT_SPECTRA will show the new configuration.
- OPTIMIZE_MASK. This allows the user to optimize the mask
design by increasing the length of the slits up to the point where
there is an overlap with a neighboring slit.
It is important to realize that this optimization will not extend
beyond the currently displayed region of the detector unless the user
specifies a larger area.
As well as updating the MASK list, this procedure creates a new list
of type BOXES.
Note that the fiducial objects must be given weight zero, otherwise
the position of the holes may be changed by the procedure.
These procedures can be repeated in sequence until the optimal
configuration is obtained.
The whole process is summarized in Fig. 4.
It is possible to modify these procedures for your own use; they can
be found in the directory LDSS_PROC.
Alternatively, you can use any of the specialized LEXT functions
for the same purpose: PLOT/DIRECT, PLOT/BOX, GROW, CURSOR/EDIT.
Once the mask design has been finalized, a file containing the
manufacturing instructions for the observatory's mask manufacturing
facility can be generated using the command:
This will produce a file named file.MFR which can be sent to the
observatory for use in physically making the masks.
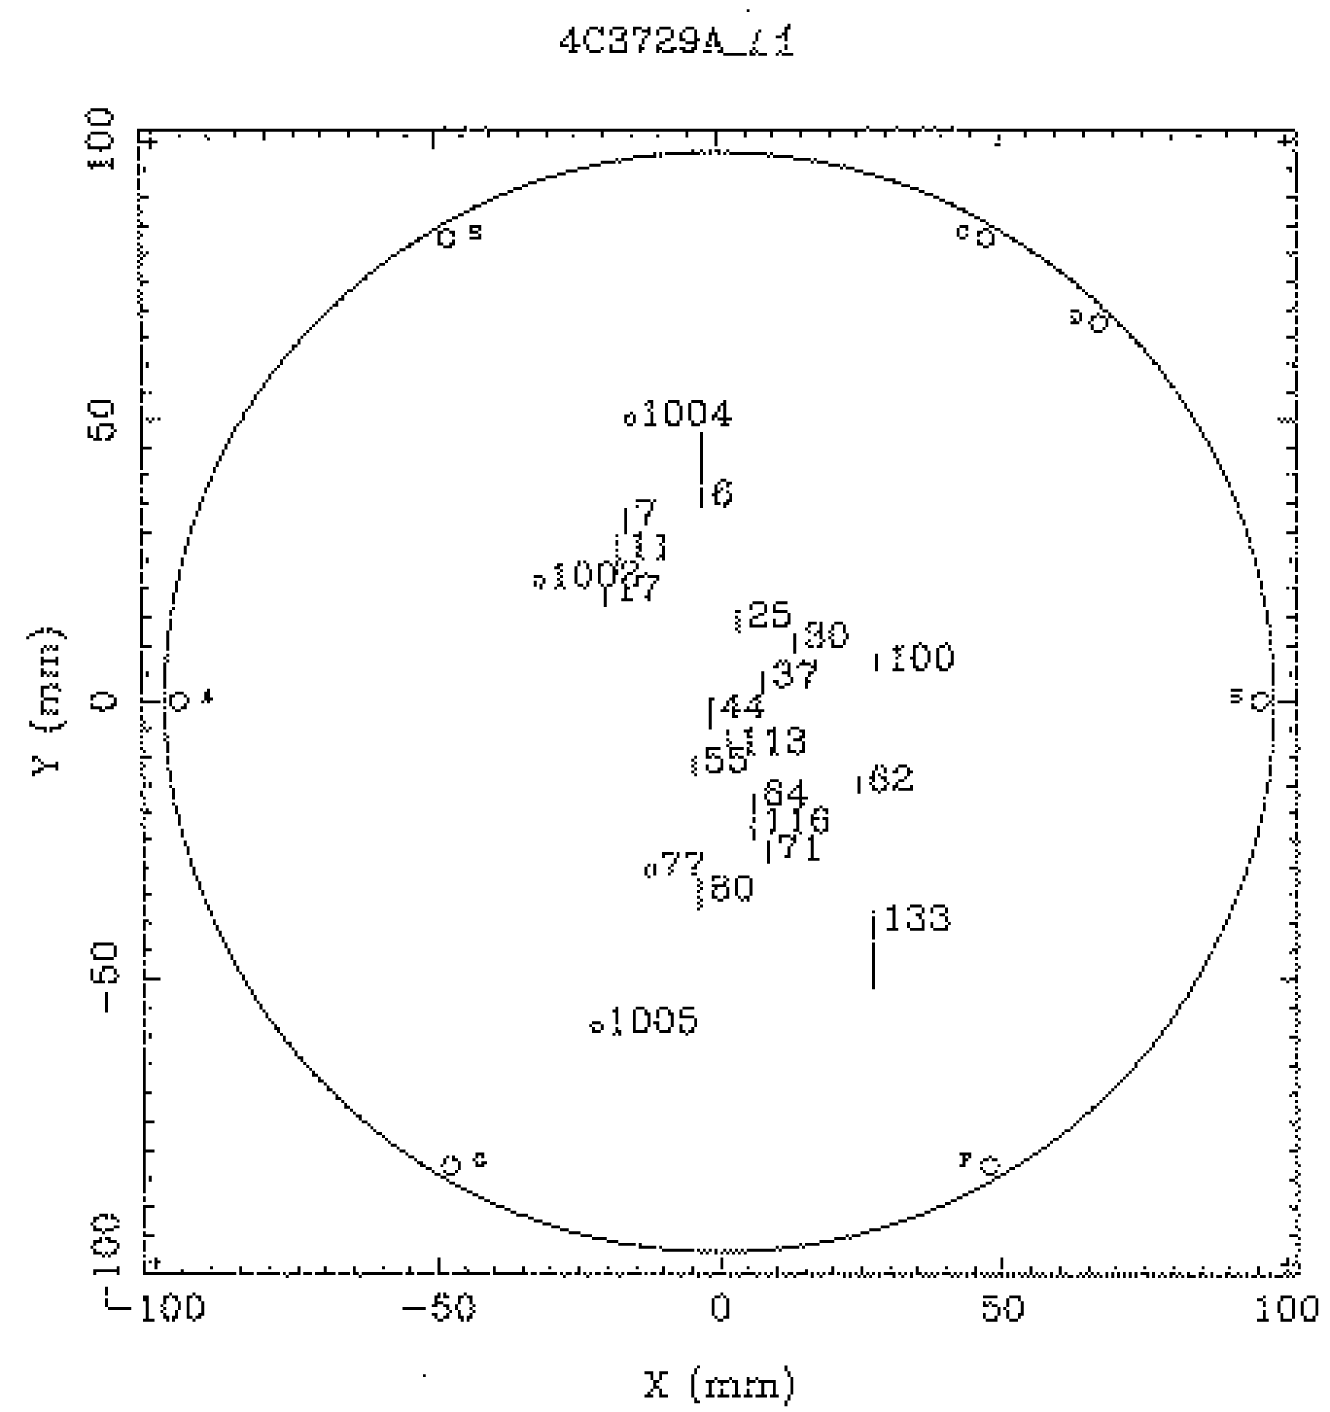
The procedure DRAW_MASK produces a drawing of the mask which (if
reproduced on a suitable high resolution plotter) could be used for
alternative fabrication methods.
An example is shown in Fig. 7.
This output can be used to double check the target distribution and the
final mask.

Previous: Generating relative astrometry from LDSS-2 images
Up: Preparation of mask data
Previous Page: Generating relative astrometry from LDSS-2 images
Next Page: How to get the masks made